Are you having a project update meeting with a client and want to share the progress of the work? Do you need to send the team’s timesheets to HR? Are you about to invoice your client and want to attach an itemized list of all the tasks you have done? Do you have an audit coming up and want to share the time data with your team?
All these activities will require you to extract some type of data from Timeneye.
You can do it from several sections in Timeneye, by using the export feature.
#1 Exporting A Report
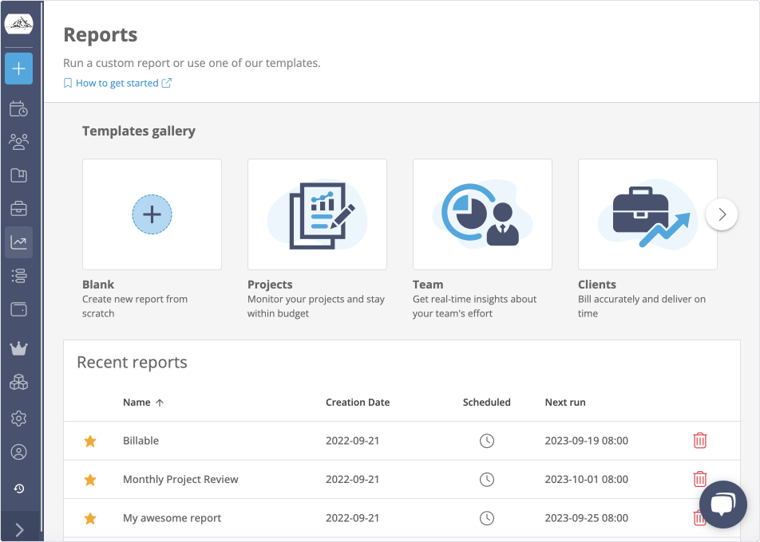
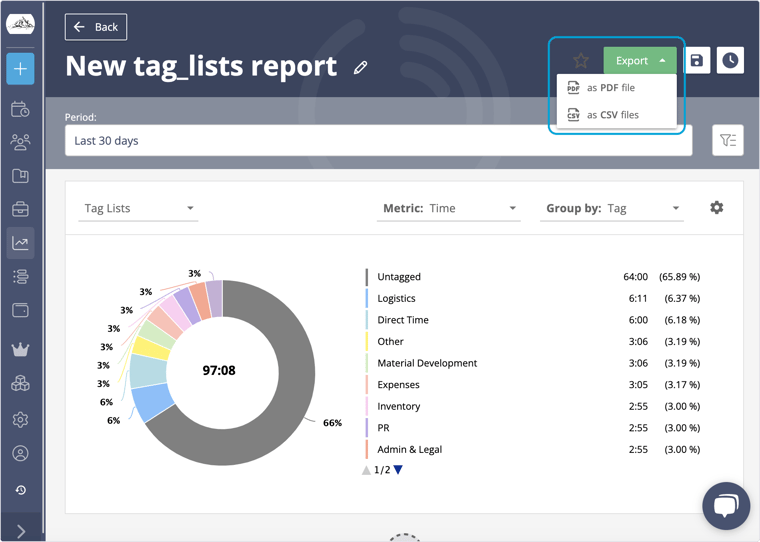
Whether you’re running a report on projects, team members, clients or even a tag or billable report, you can export it to PDF or CSV in a few simple steps.
First, run any report from the report section. Choose any type of report.
When you’re on the screen of the finished report, look for the export button on the top right.
Click the button and select either the PDF or CSV option.
The PDF prints the view with the totals, the charts, and the graphs, along with the filters you decided on earlier for the report.
The CSV, on the other end, is in a compressed folder with the data for each section of the report.
The CSV files can be opened with programs like Excel or uploaded to other software.
#2 Exporting Timesheets
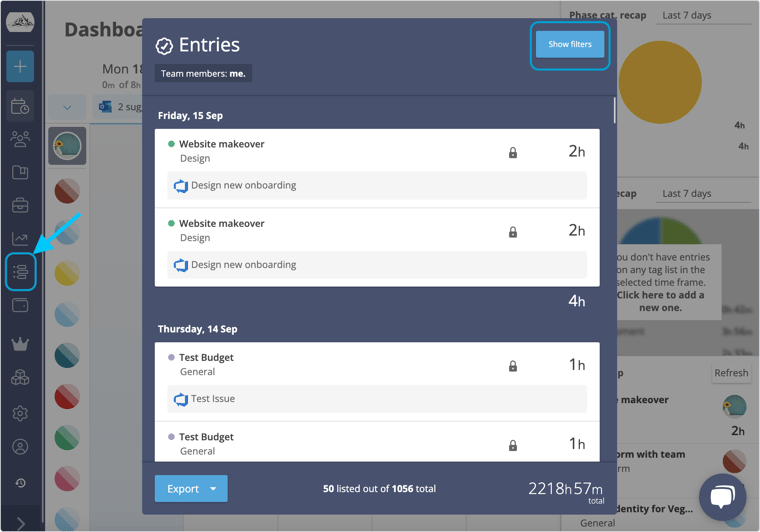
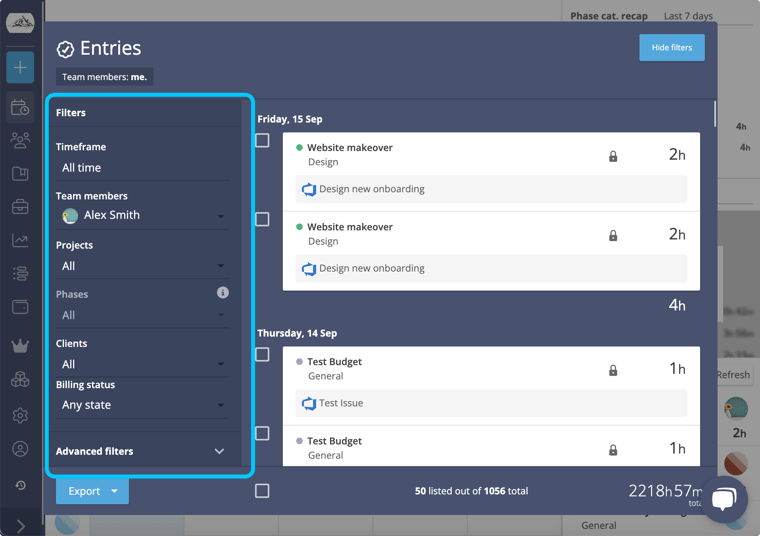
Do you need a file of your or another user’s worked time? Go to the Entries section of the workspace.
Here, a user can export a detailed list of the time they have tracked within a period of time.
The “Show filters” button will open all the options to sort out the entries on the left.
Select the timeframe you need. There are some preset options available like “Last month”, or “This month”, or a custom timeframe as well.
Then, on the bottom left, select the Export button and export the data to PDF.
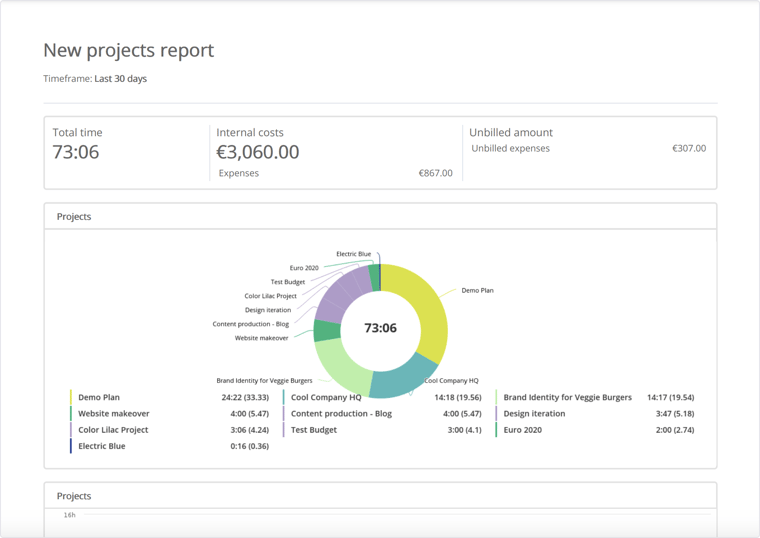
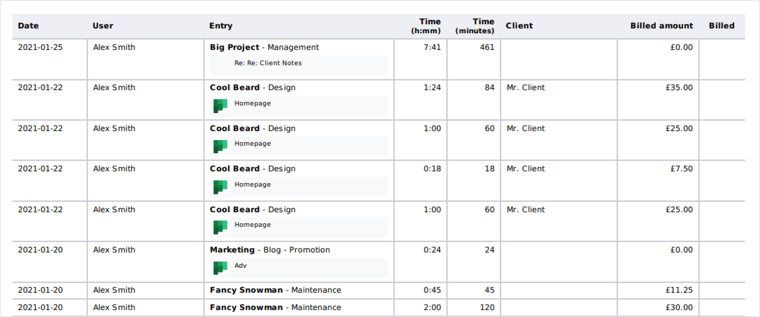
The file will look like this:
#3 Exporting an Itemized Lists Of Activities
Let’s say your clients require a detailed list of the projects and the activities they’ll get invoiced for.
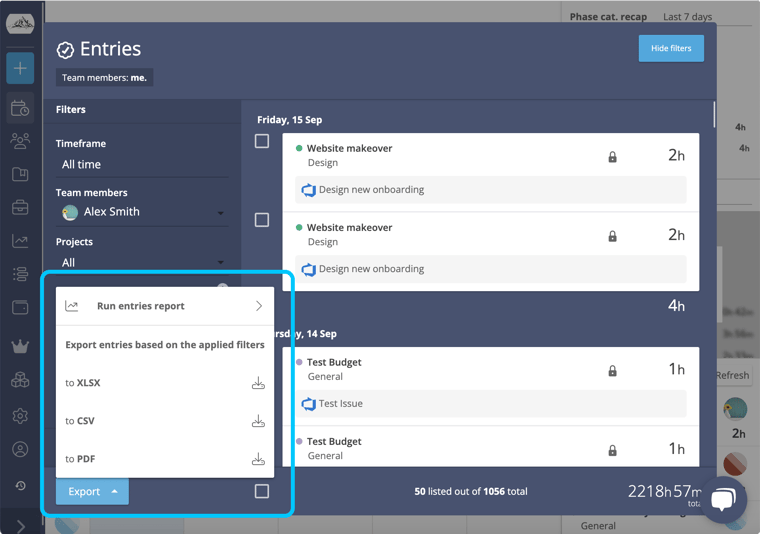
You can export this data from the Entries section.
Instead of only using the timeframe filter, this time you can add a project, phase, or user filter.
Then, when you go to export the data, you can either dowonload the data from there, run an entry export.
Some people do not want to show clients some of the details from the file. In this case, we always recommend downloading the CSV file, then removing columns from there, and use the rest of the data to craft the final report.
Even if it’s not a requirement, attaching such a file to your invoices will help build transparency and trust with your clients.
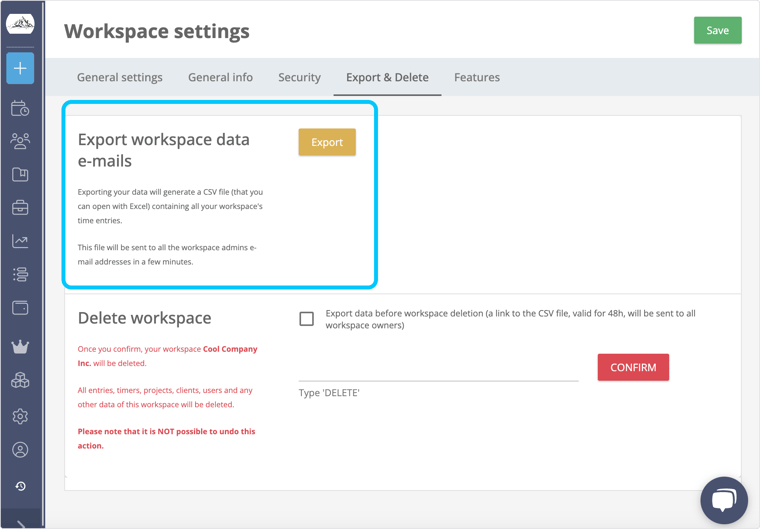
#4 Exporting A Backup Of The Whole Workspace
Do you need a quick way to export all the data ever tracked on the workspace?
In the Workspace settings section, there’s an Export&Delete tab. Click on the export button and it will generate a CSV file with all the time ever tracked in the workspace.
Bonus Tips: Scheduling And Automation Options
Do you have a lot of reporting to do, but little time to do it? You can use the automation options in Timeneye to schedule reports and have them automatically delivered to your email.
Exporting a report:
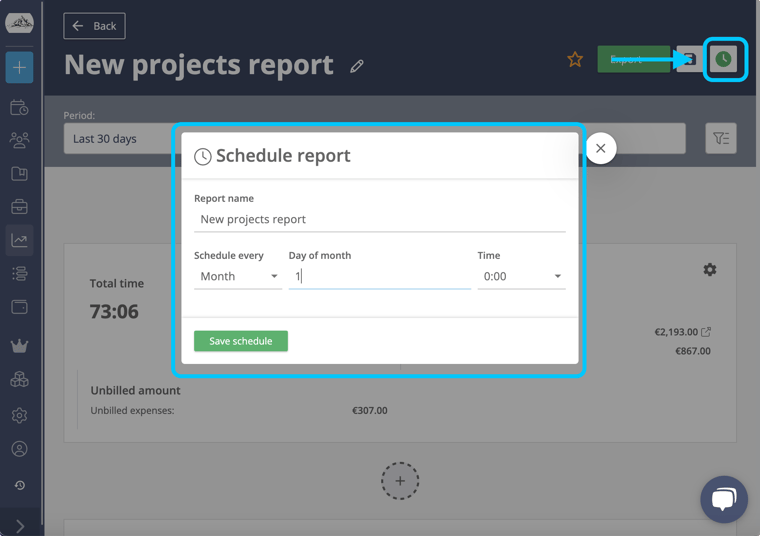
If you want, you run the report and use the star button to save it as a favorite.
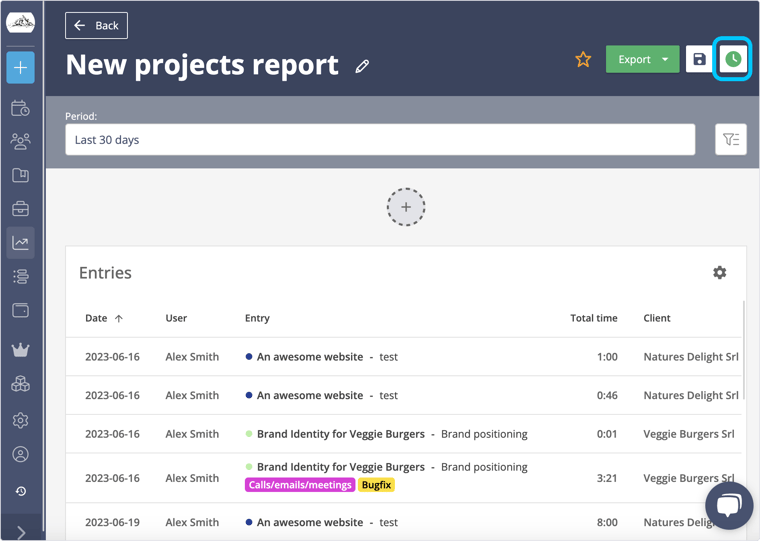
In the same topbar, click on the clock icon to schedule the report.
Then, you simply have to tell Timeneye when you want to receive the report.
That’s it! The report will be conveniently delivered to your email.
Scheduling an automation of the Entries export
You can also schedule entry exports. This time, you need to do it from the "Run entry export option" in the timesheets section.
There, click the little clock icon.
And you’ll be able to set the frequency of the exports.
I hope this will help you in your daily reporting tasks!
Time to try this feature
Head to to your workspace and unlock the potential of the export features, revealing invaluable insights.


%201%20(1).png?width=760&height=281&name=timeneye-csv%20(1)%201%20(1).png)