We’re excited to officially roll out one of our most requested features: the Timeline View now available to all Timeneye users!
After months in closed beta and tons of feedback from our early testers, the Timeline view is available to all users. This new view introduces the ability to track time with specific start and end timestamps, offering a more detailed and visual approach to your time management.
Why Timelines Matter
While Timeneye has always let you log time based on duration, many of you asked for a more precise way to reflect your working hours, which also helped users visualize how their days were used. With the new Timeline View, you can:
-
Visualize your day like a calendar, hour by hour;
-
Log exact start and end times for your submissions;
-
Gain deeper insights into reports with timestamped data.
Whether you're managing your daily activities or logging hours for client work, Timeline gives you more clarity, control, and context.
How to Turn Timeline On
The timeline view in Timeneye is included in the additional Settings feature that can be activated globally for the whole workspace. By default, new users will find Timeline already activated, while our longstanding users (those who signed up before the update) will need to enable it manually.
-
If you're the Owner of your workspace, head to the Settings section;
-
Click on the Features tab;
-
Scroll until you find Timeline, and flip the switch (it will become green).
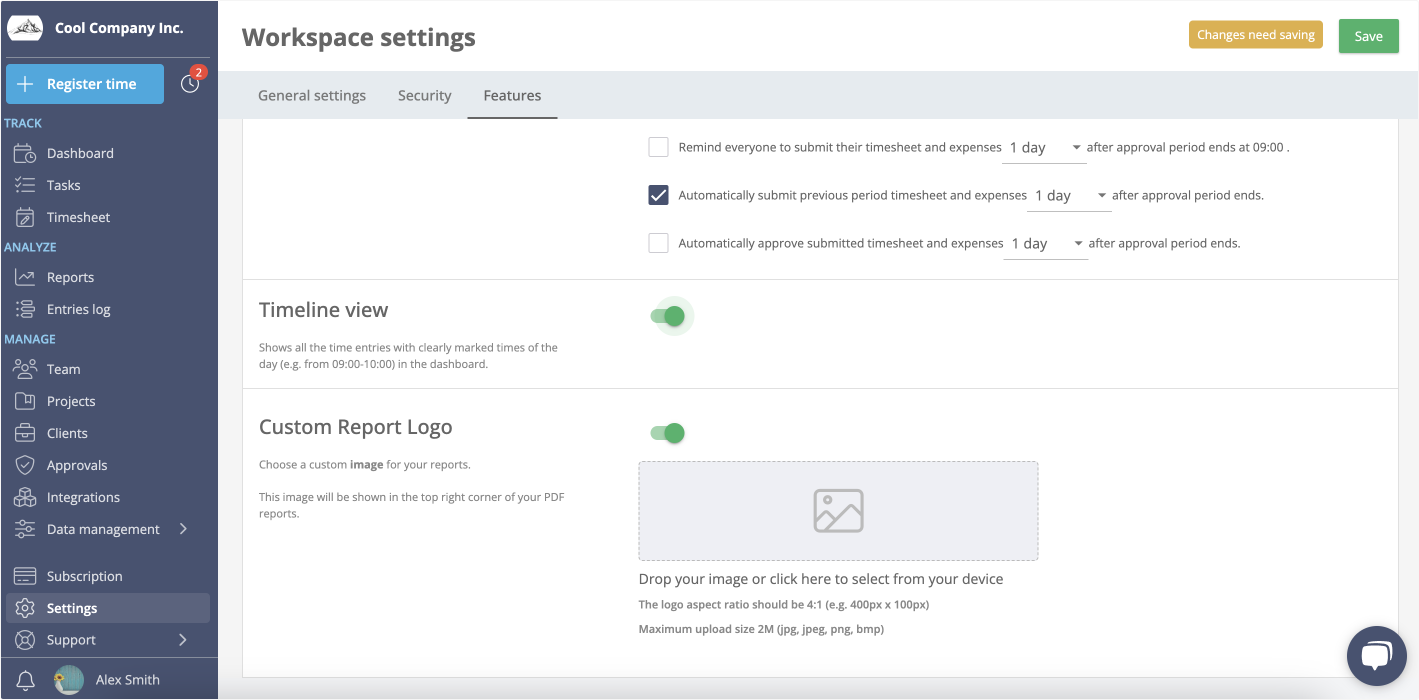
Once enabled, it’ll be activated for the entire workspace. Then, it will be up to individual users to decide whether to track time in the Timeline timestamped view, or if they prefer to used the duration-based method.
Using Timeline View: A Quick Walkthrough
Here’s how to make the most of Timeline once it’s activated:
-
From your Dashboard, you'll see a brand new option depicting both the traditional card view, and the new Timeline view. Click on the Timeline view to switch to the new mode.
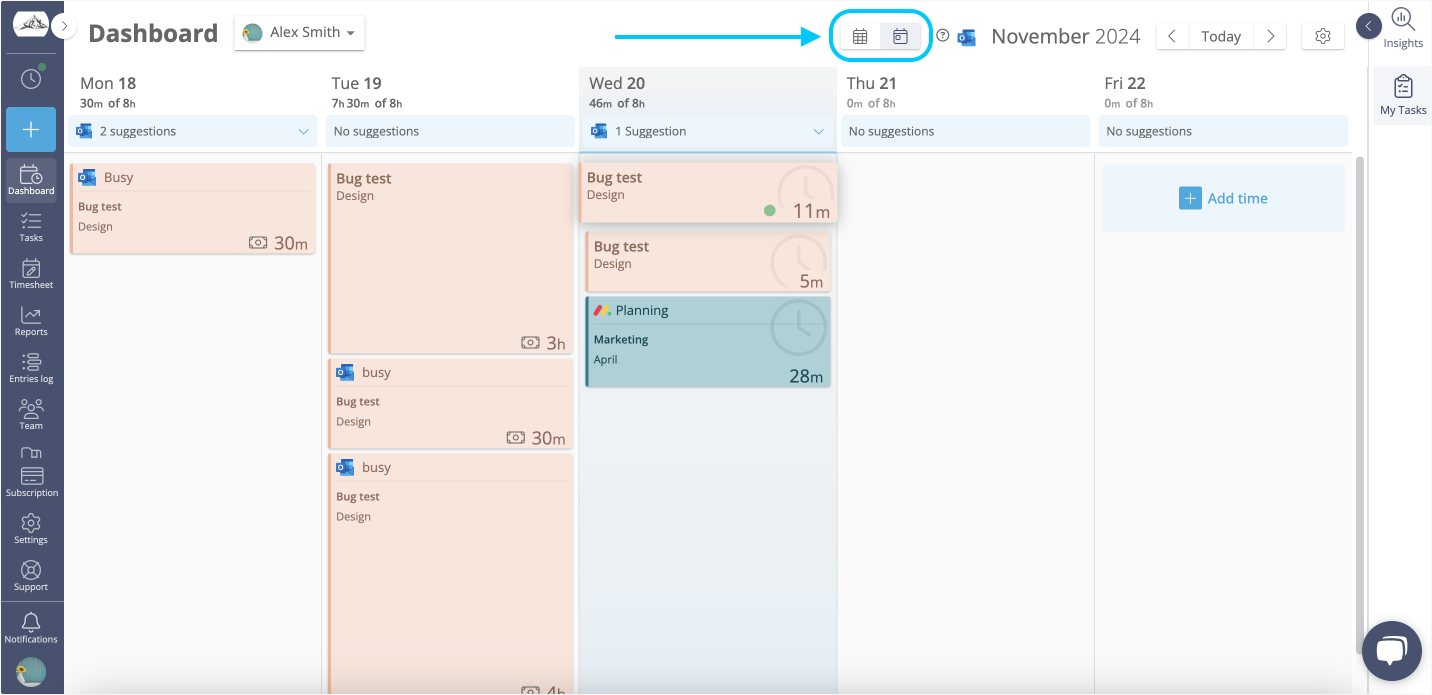
-
You’ll see a calendar-style layout, with hours clearly marked on each day.
-
To log time:
- Click "Register Time" or double-click a time slot.
- Enter your Start and End times.
- Assign the Project, Phase, tags, notes, then hit Save or Start Timer.
Just a quick note: if you start a timer in Timeline View, pausing and resuming isn’t supported—just stop and start a new one if needed. The option remains available in the Duration mode.
To edit your entries easily, adjust their length by dragging the bottom corner to update the end time. For more detailed edits (like project or notes), click the pencil icon on the card to edit all the time entries details
Where to See Your Time Entries
With your timestamped entries meticulously recorded, you might wonder where to view them and assess your productivity. Here’s how and where your entries will be displayed within your Timeneye workspace:
-
Entries Log: See all your entries in one place, grouped by project/phase. Entries from Timeline will show start and end times clearly.
-
Reports: Add an "Entries" section to your reports to see the new From/To columns. Perfect for audits, reviews, and client reporting.
Ready to Try the new Timeline view?
We're excited to introduce this top-requested feature, and we can't wait to hear your feedback! Enable the Timeline today from their Workspace Settings. Have questions? We’d love to hear from you at support@timeney.com.
.png)