How to Timeneye
Timeneye Quick start Guide
Discover Timeneye, the perfect time tracking tool for enterprises, small teams, and freelancers. Track projects, analyze team performance, and boost...
Discover the best practices for efficiently tracking time on a large scale with Timeneye for big project portfolios.
You don't have to wrangle projects and resources alone: let technology help you!In this article you'll learn:
Timeneye offers a range of features that can be utilized to efficiently a large number of projects.
For example: in Timeneye you have the ability to import your projects from other software. You can also manage and control how many people are part of each project, and who is working on which project(s).
Additionally, Timeneye allows you to set categories called "Tags". Tags are versatile labels that can be used to keep your massive portfolio in order and assign the correct time entries to the projects you need.
Furthermore, Timeneye provides real-time project monitoring. This allows team members to track their time spent on each project, and provides managers with accurate insights into project progress. Real-time tracking helps in identifying any issues or delays that may arise during the project lifecycle, and solve them promptly. All this data can be conveniently displayed in automated reports.
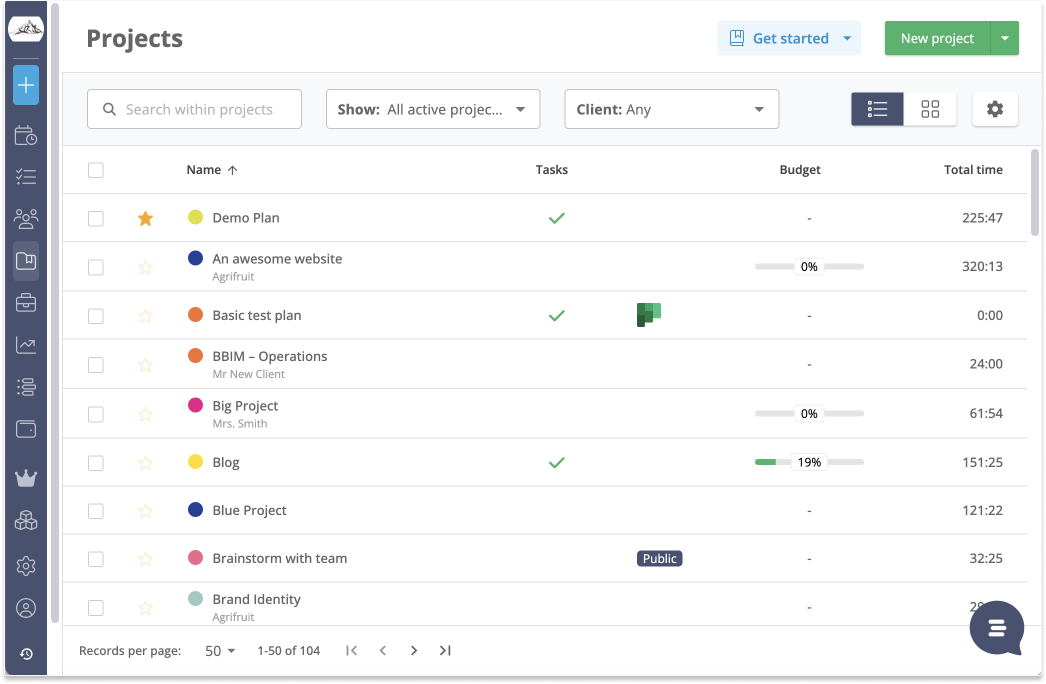
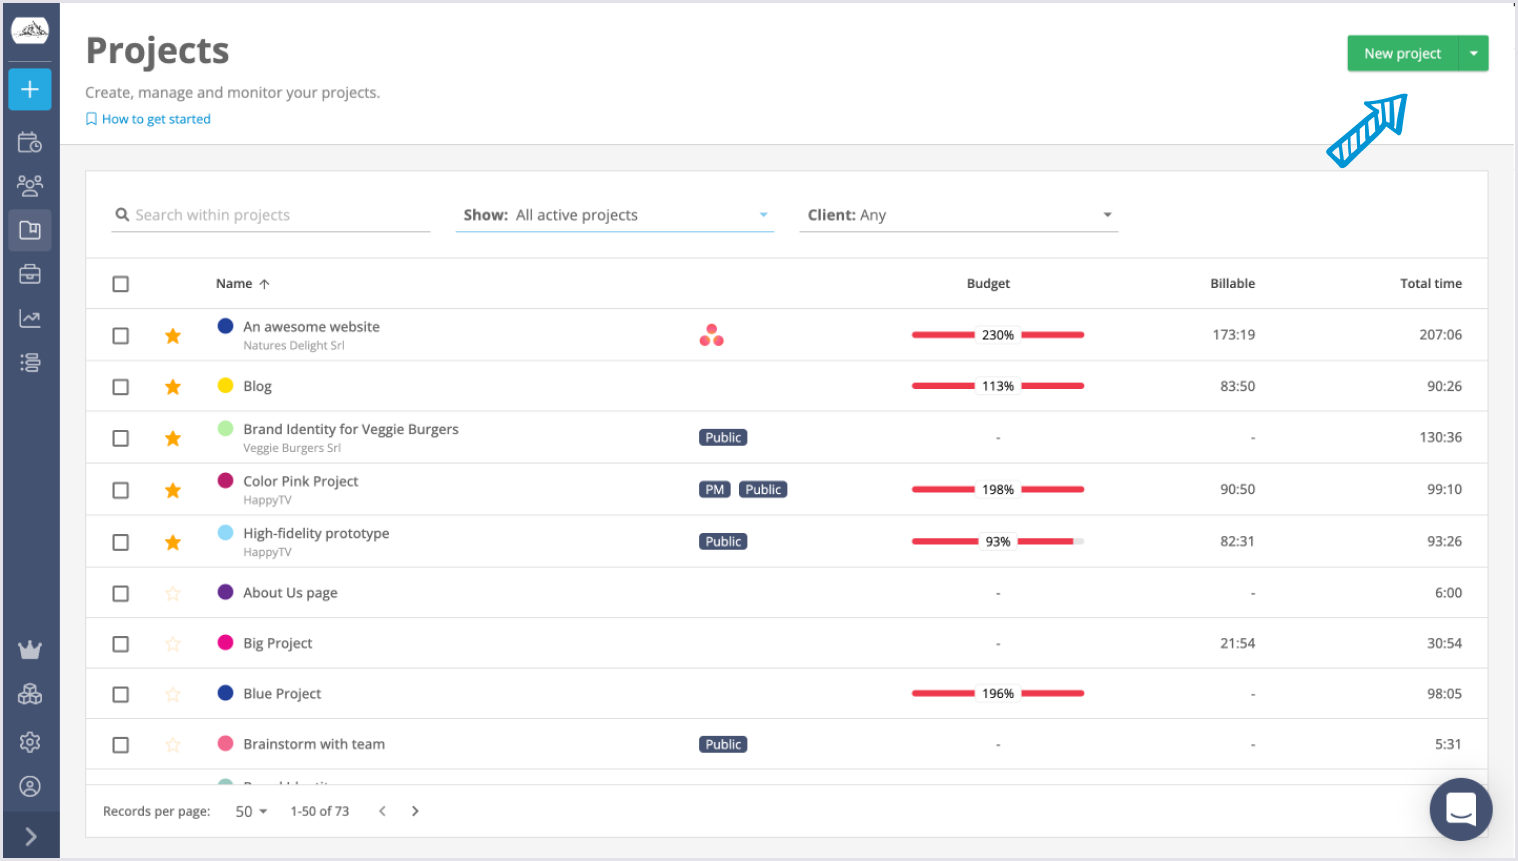
Projects in Timeneye can always created manually in the Projects section. However, creating manually a huge amount of projects is not a recommended operation as it is extremely time-consuming. But if you still need to do it (or, if you need to add projects as the work progresses), here's how you can do it:
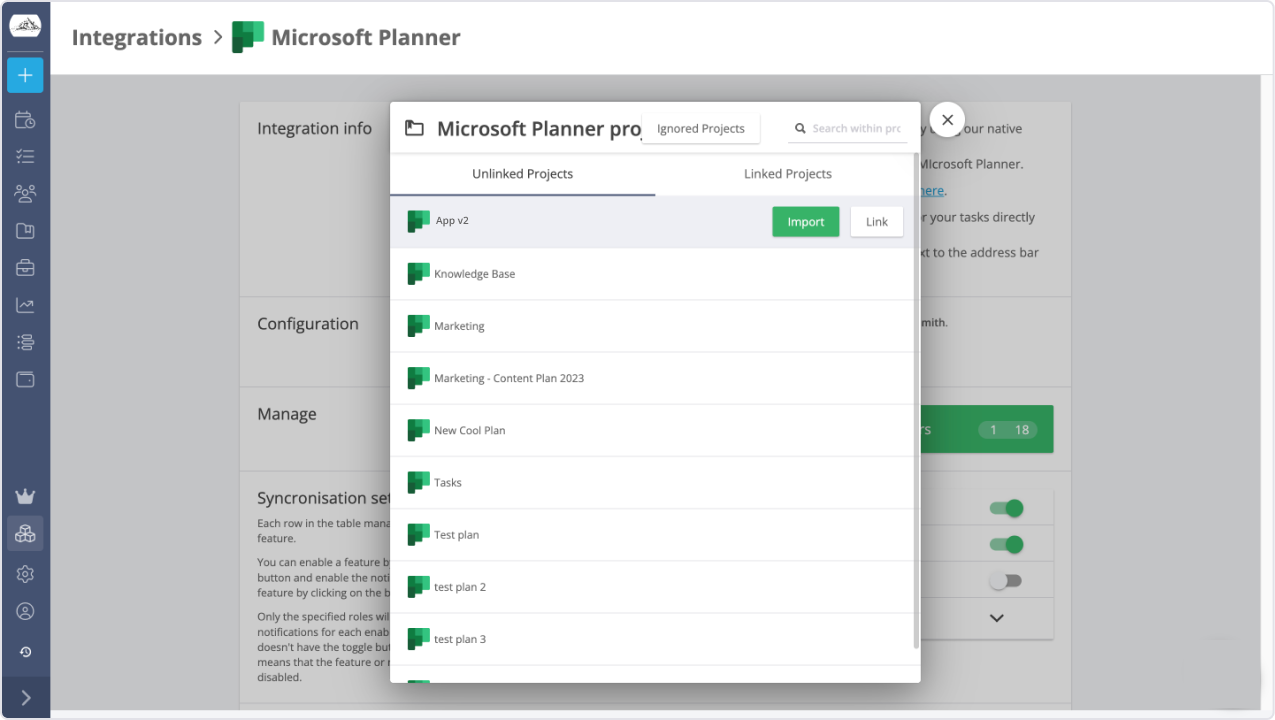
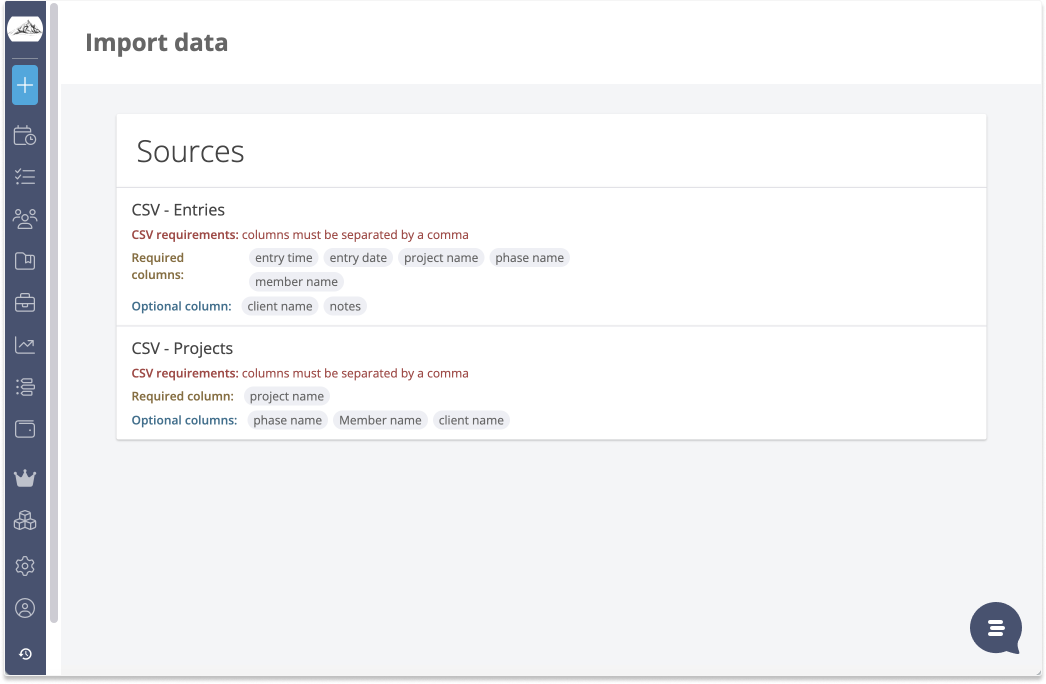
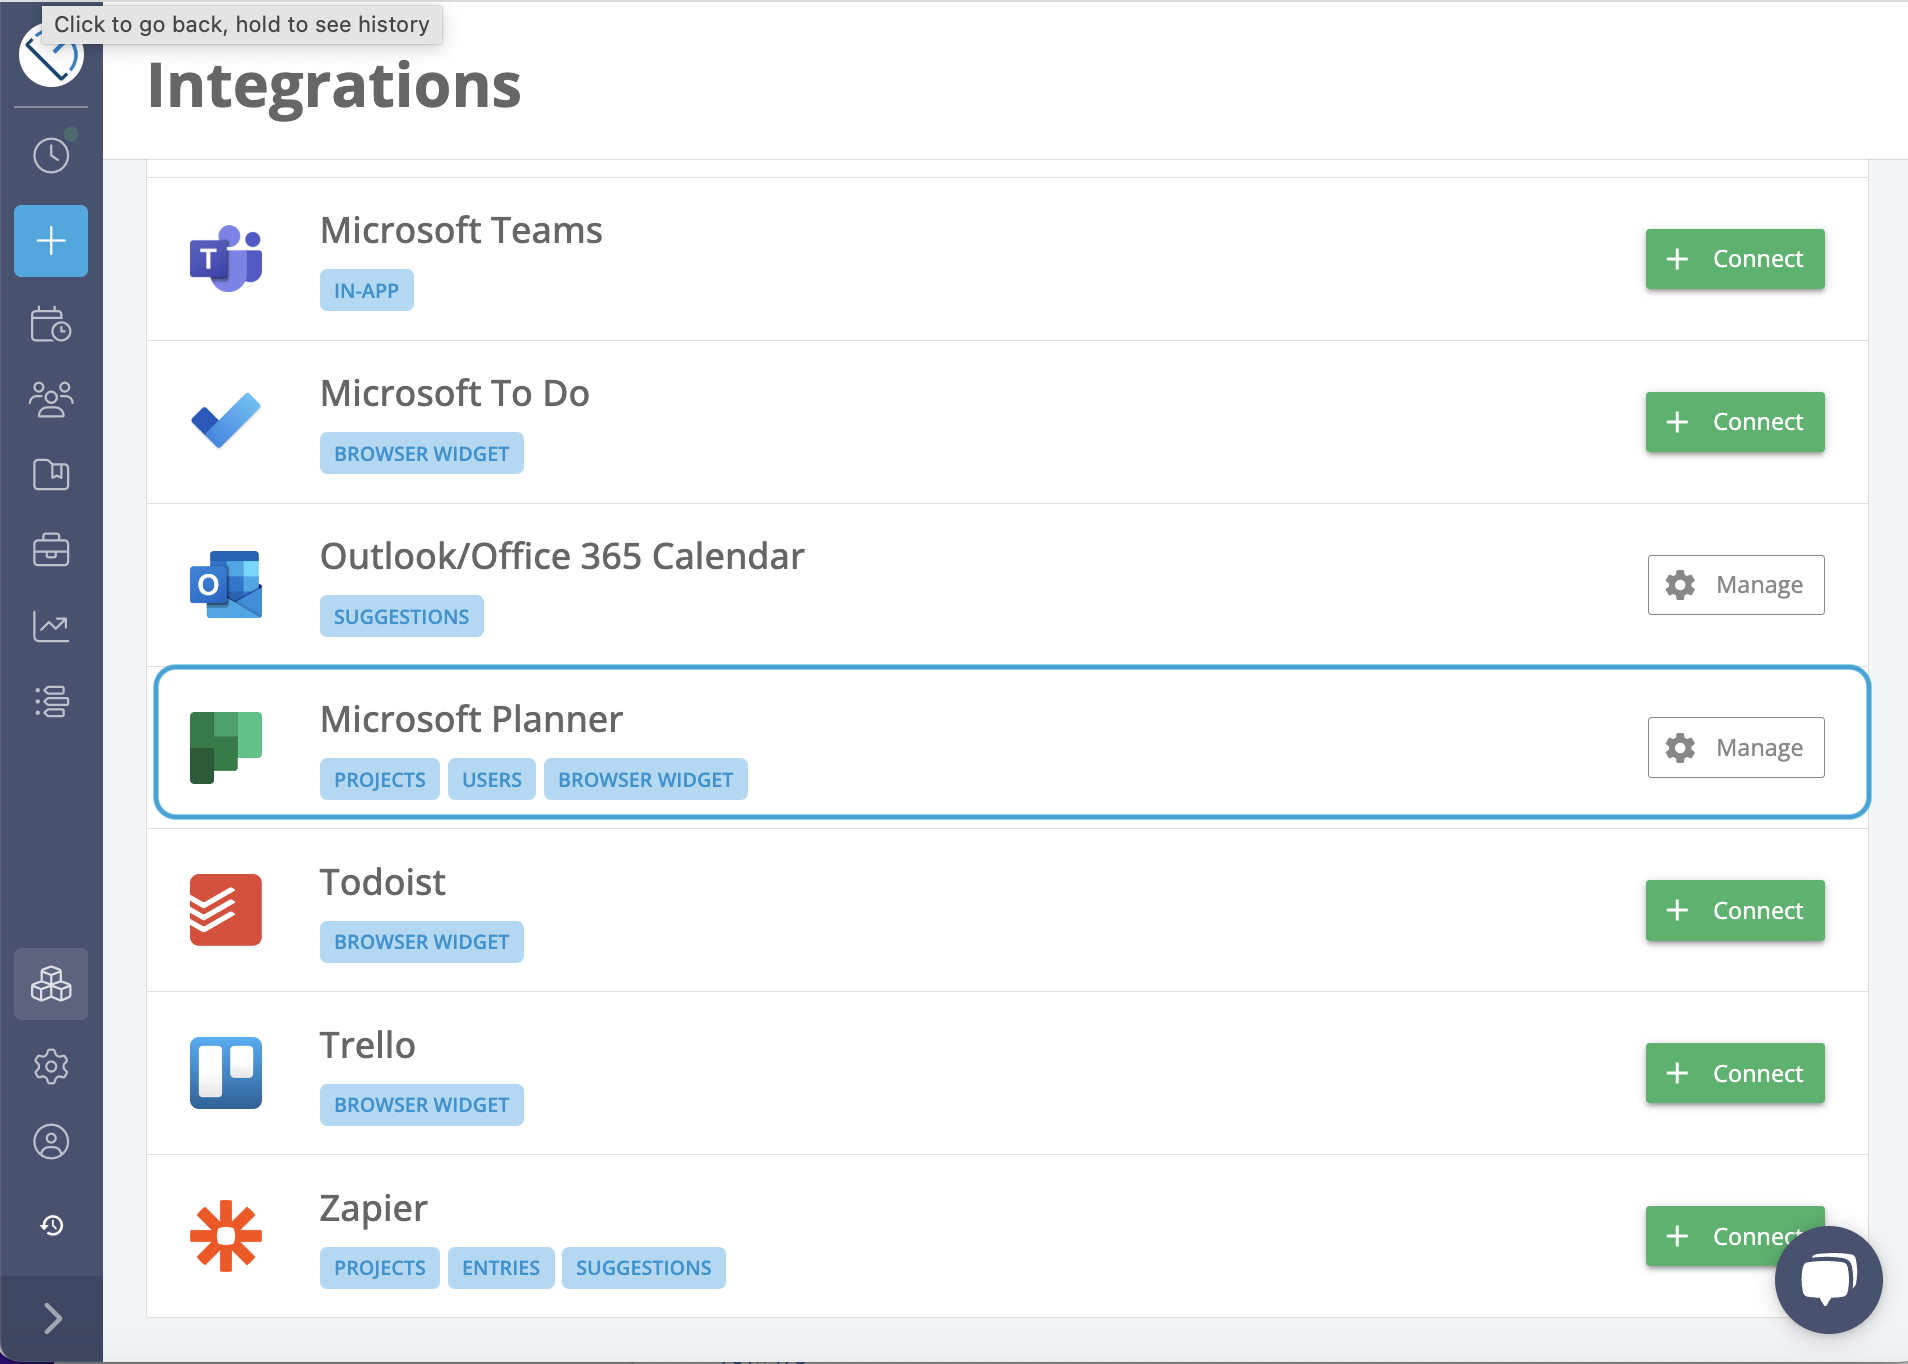
This is the quickest method for when you already have your projects in your existing Project Management tool. Right now, Timeneye integrates with several PM tools, the most popular being Microsft Planner. (For more information on the integration, see this page).
After that, all you have to do is follow the step-by-step procedure. You can upload the CSV in the Import data section:
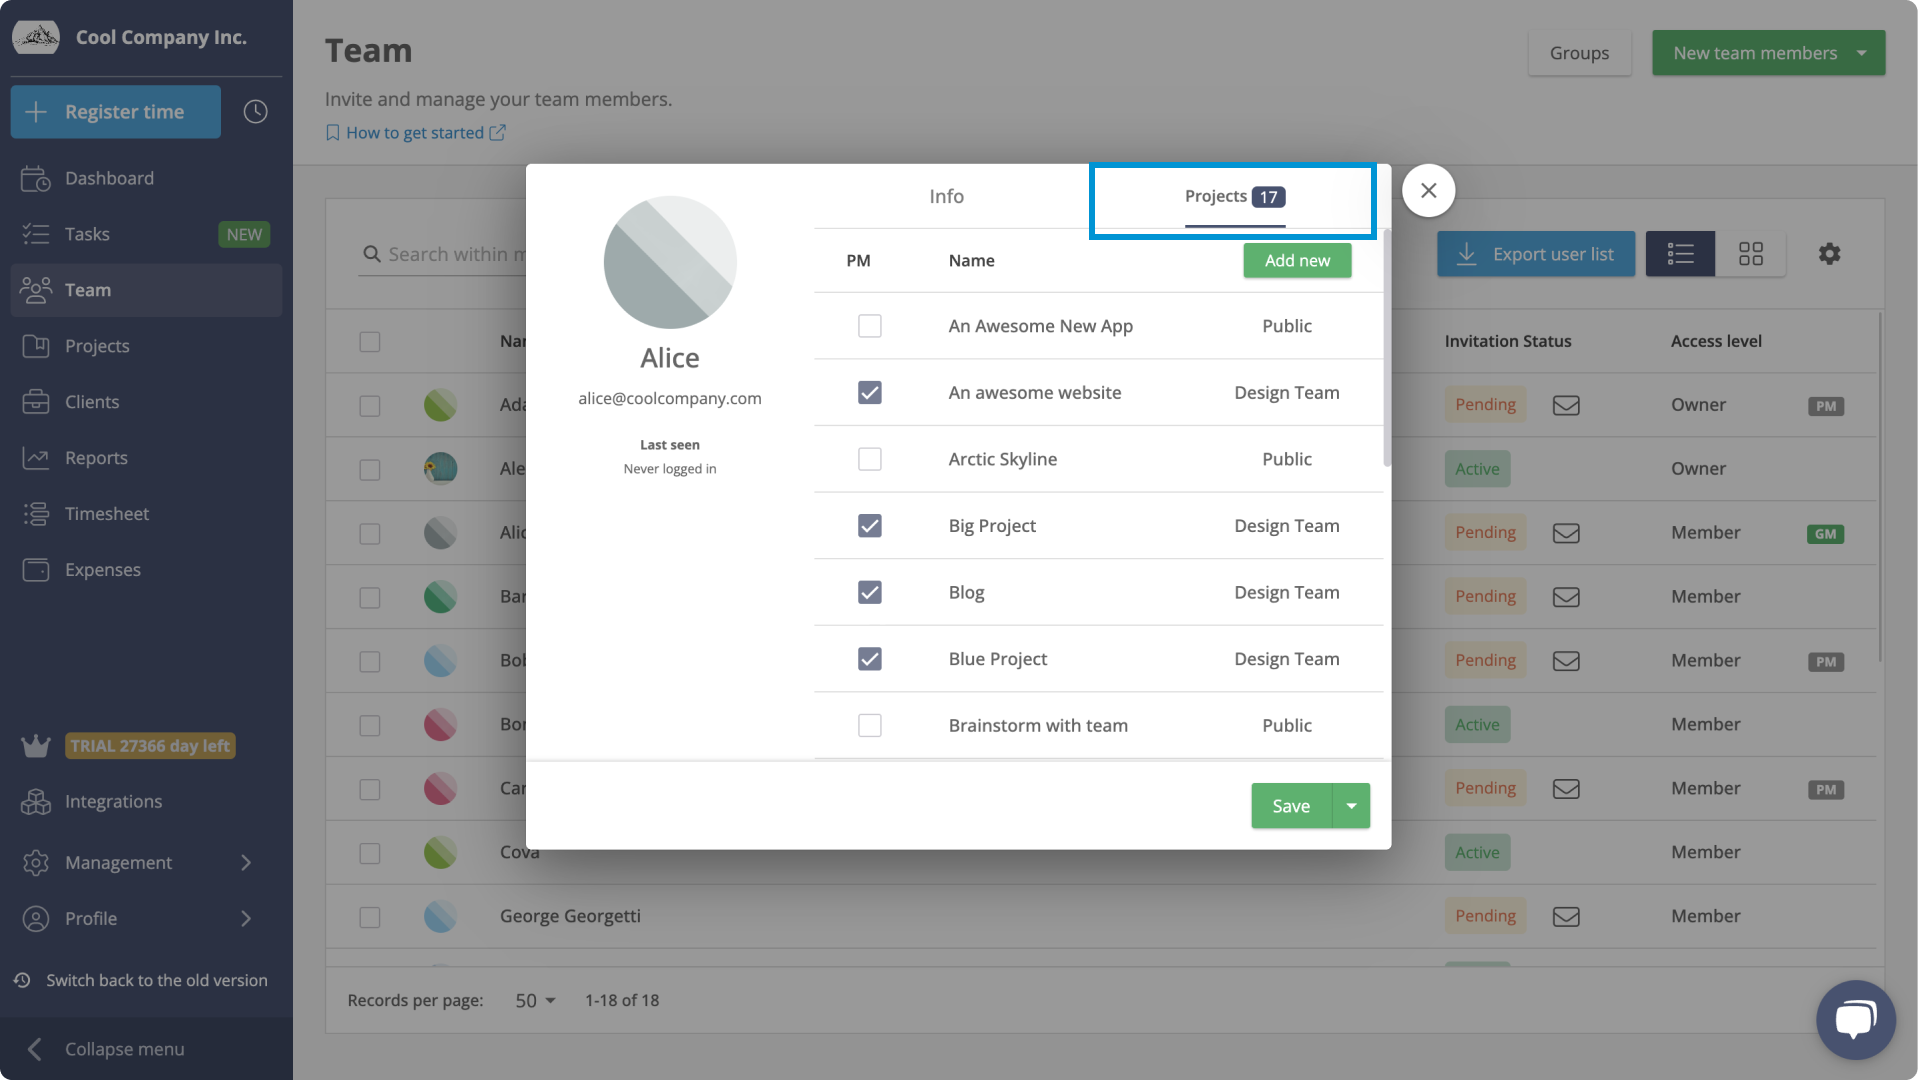
When dealing with a large number of projects, it is essential to assign team members to each project accordingly.
The Team section of the workspace is where you will go not only to add people to the workspace, or archive users, but also to check their status, change their roles and permission, and also add them to projects
Once you've connected an integration, you'll notice that among the synchronization option, there is also an option to sync users as well. By activating it, users will be automatically imported from your Microsoft Planner account, and added to the project
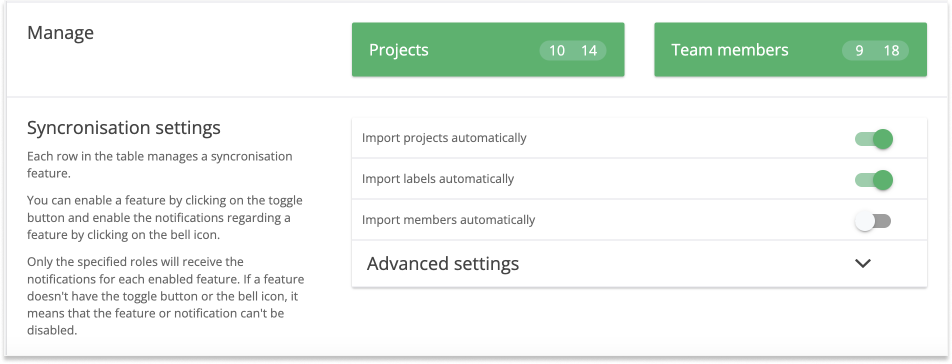
Careful though! This option is automatic so everybody gets added when you turn it on. Everybody. If you want to avoid inviting people to Timeneye by mistake, use the manual Team memebrs option instead.
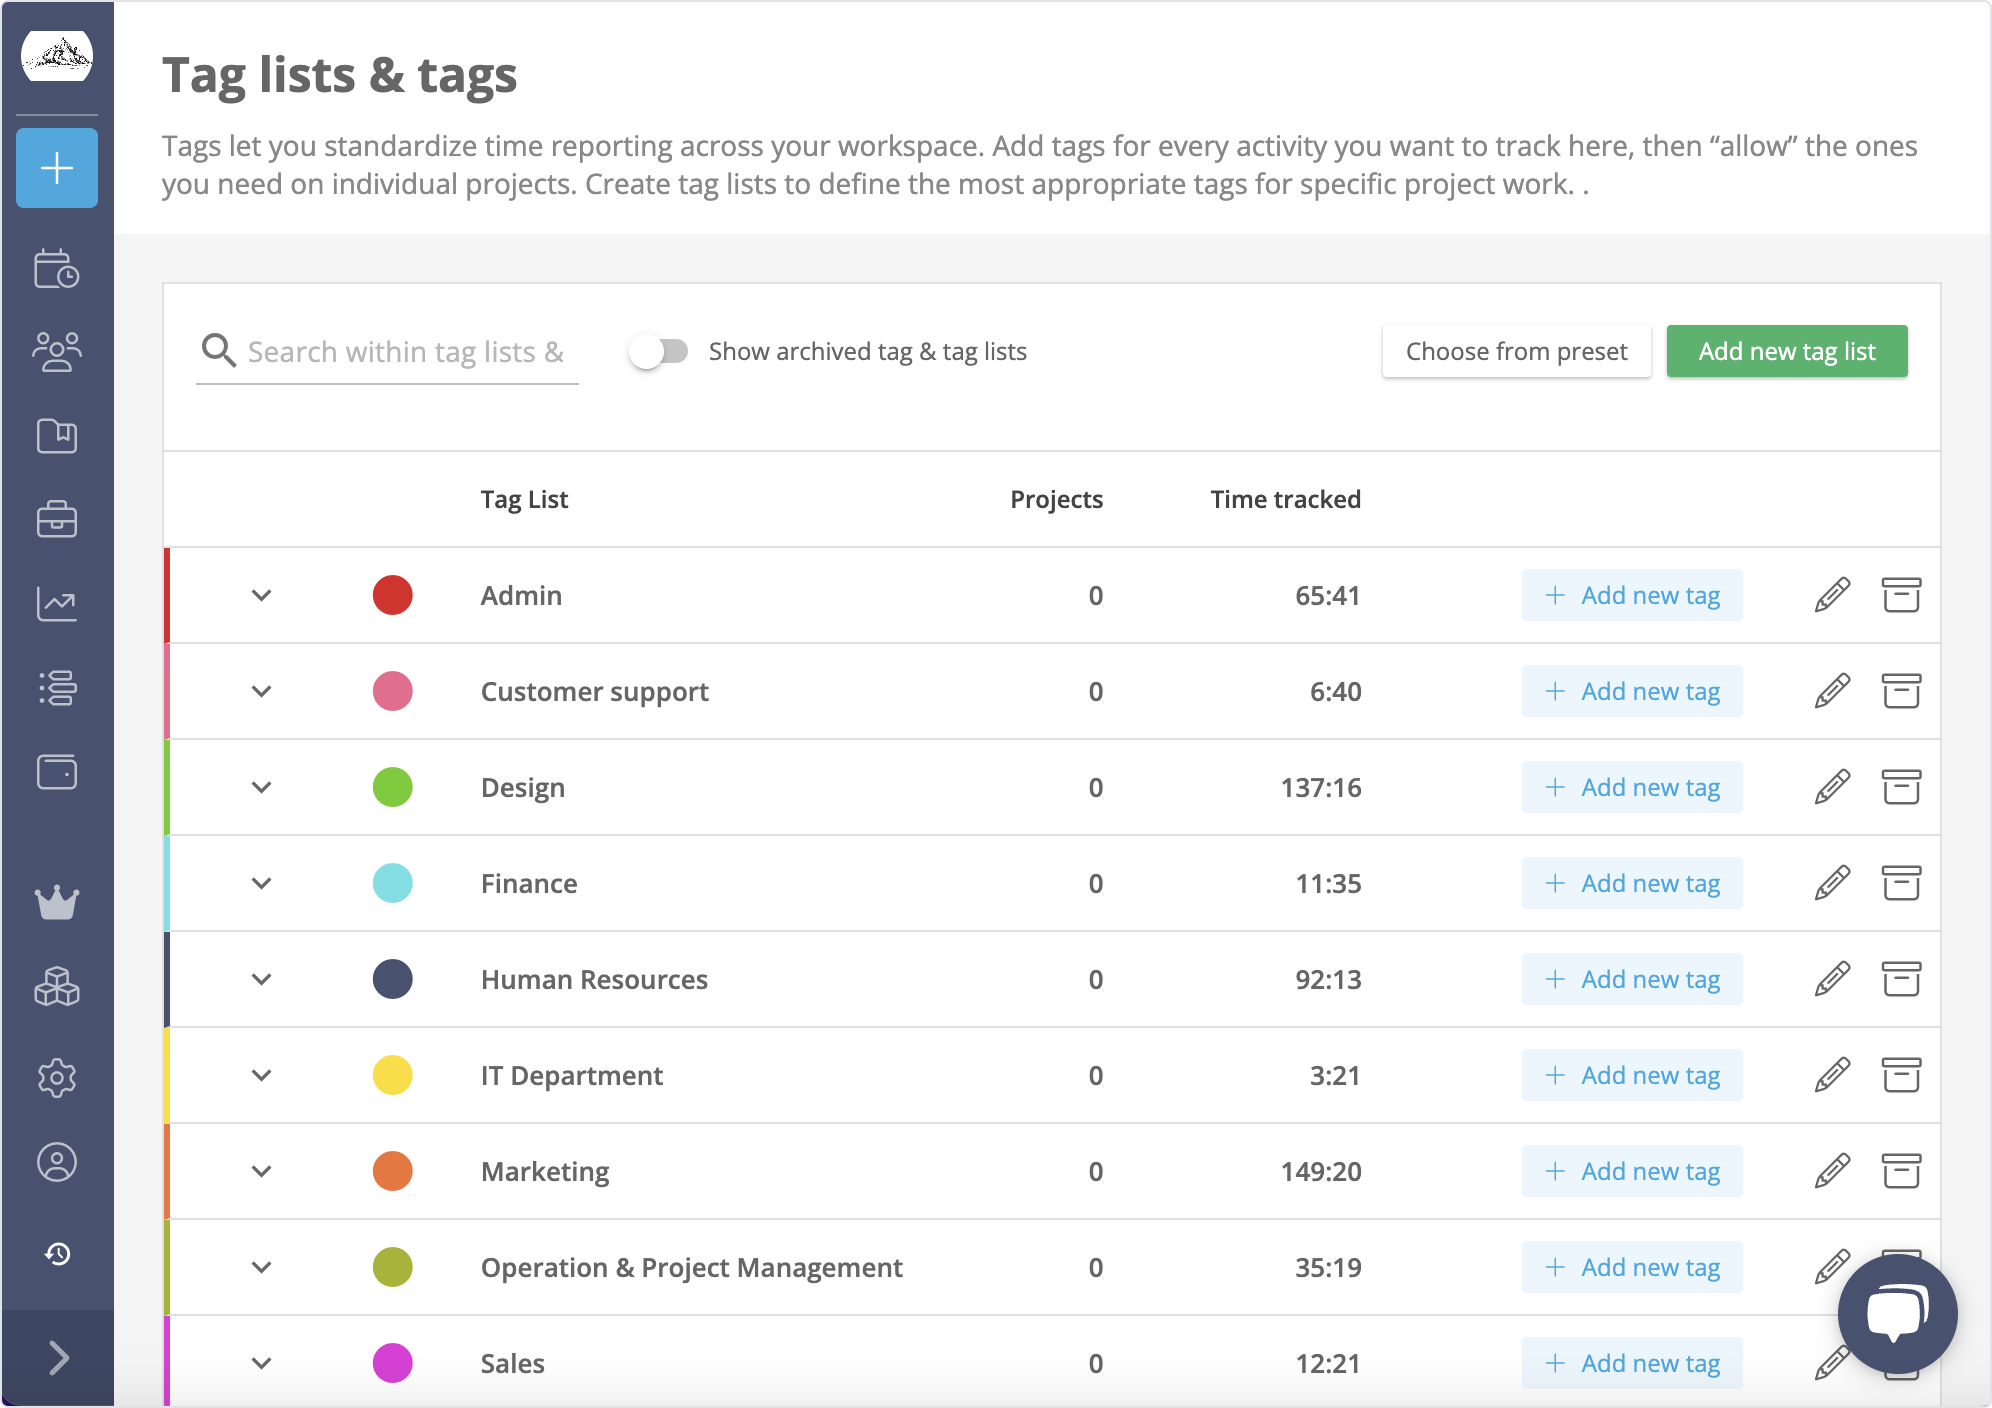
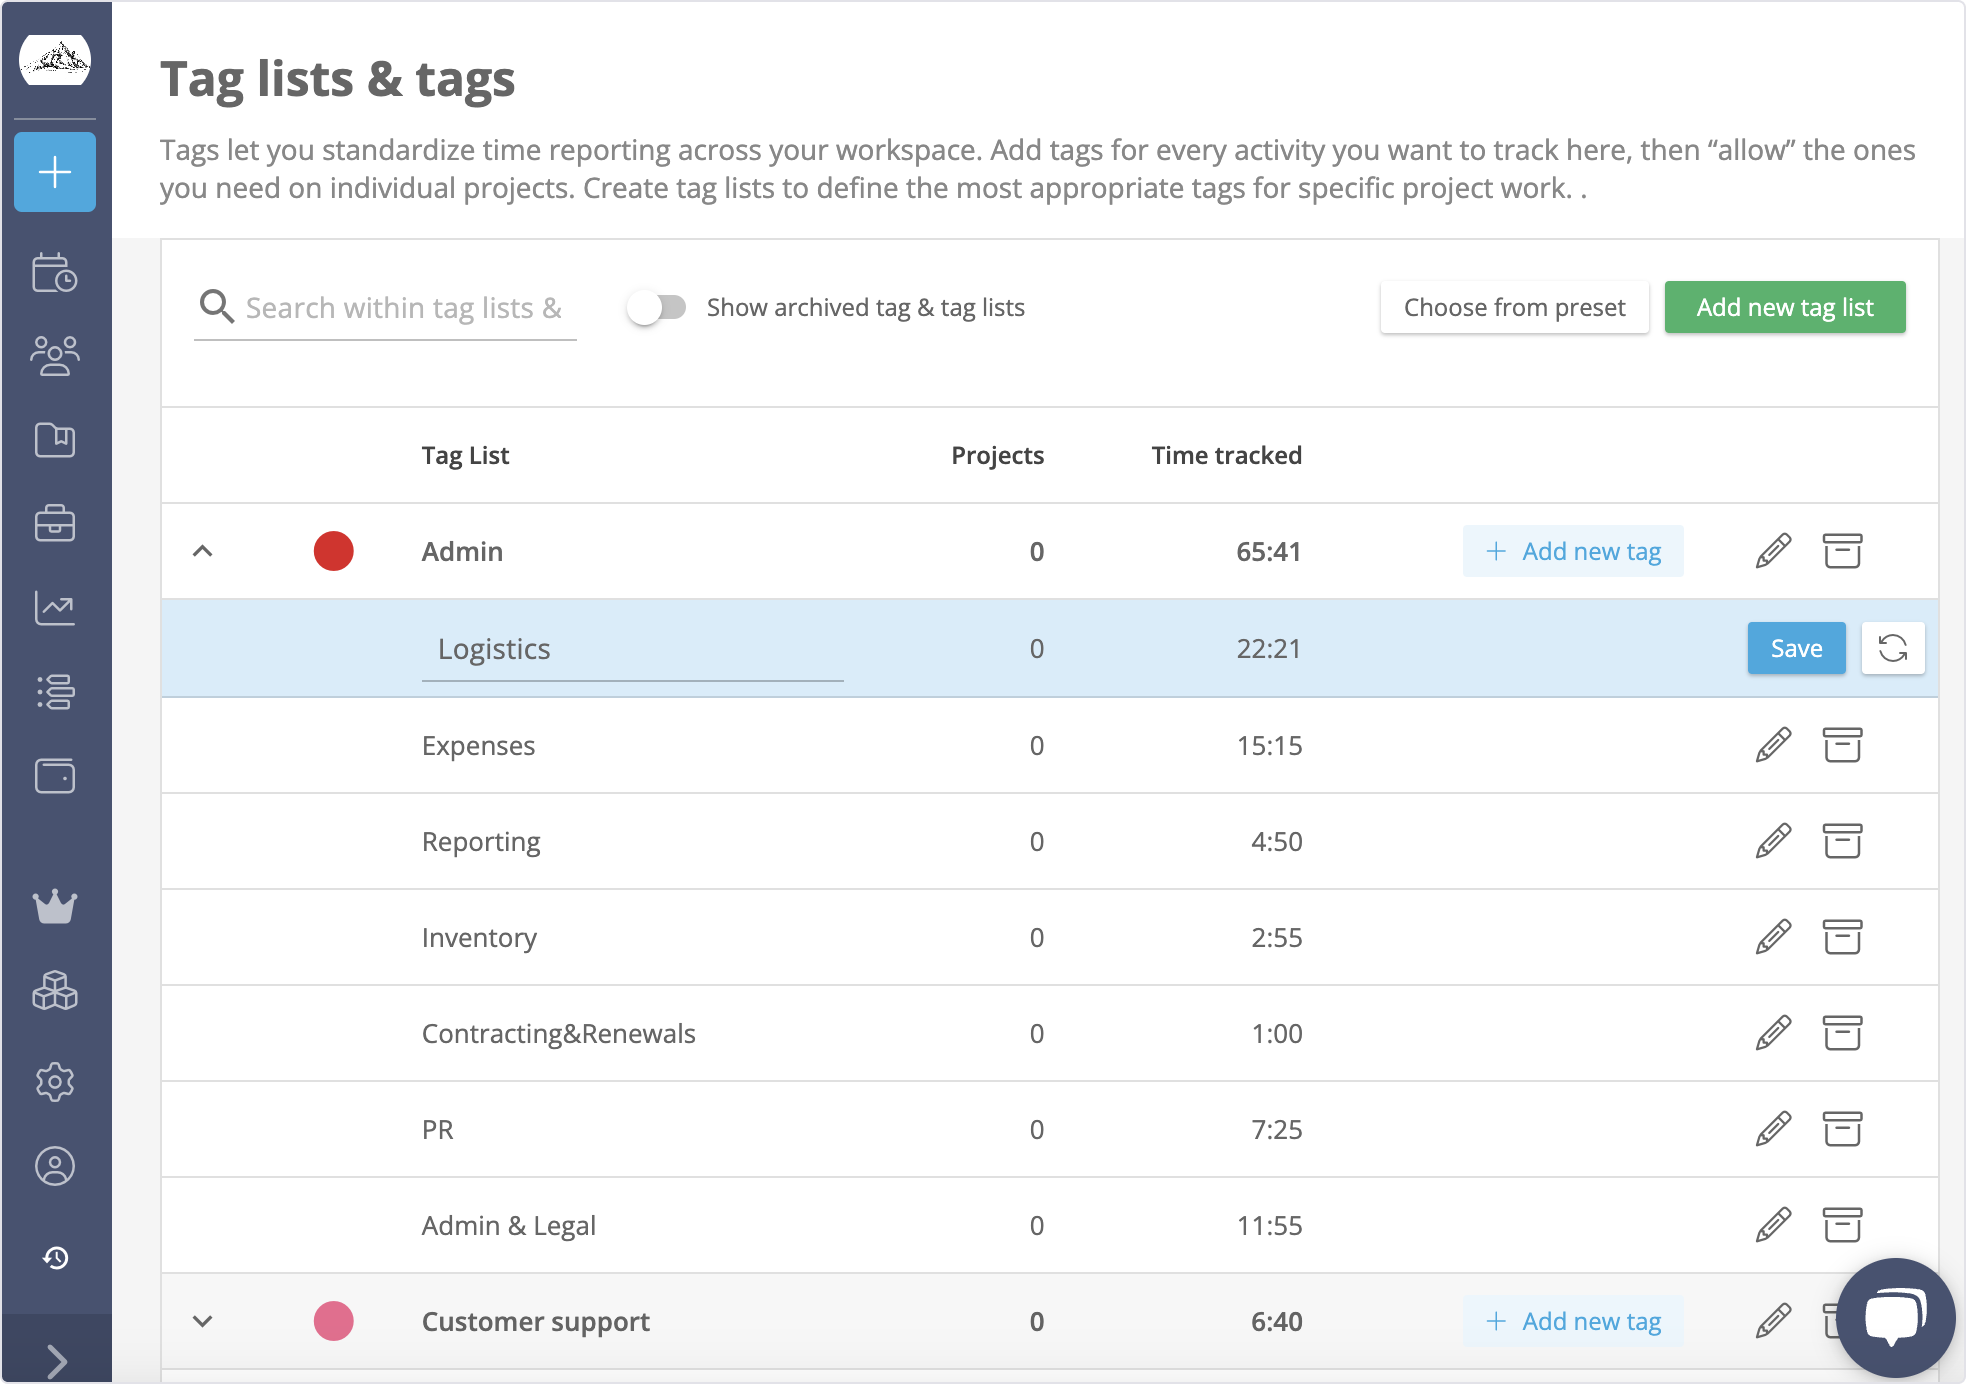
To better organize the time tracked for your projects, Timeneye allows you to create custom tags and tag lists. Custom tags can be used to label time entries based on their characteristics, such as priority, client, or department, or any other category you may need. This allows for easy filtering and searching of projects, making it convenient to track time for specific projects or groups of projects.
You can create tag lists based on project type, industry, or location (quick tips: if you don't know where to start, use our templates). But most importantly, tags can be used and tracked across different projects. This helps in organizing projects and provides a clear overview of the different types of activites being tracked.
By utilizing custom tags and categories, you can efficiently manage and categorize time, ensuring that each time entry is properly classified and easily accessible.
Click on the 'Add new tag list' button to create a new tag list
Give your list a name and save.
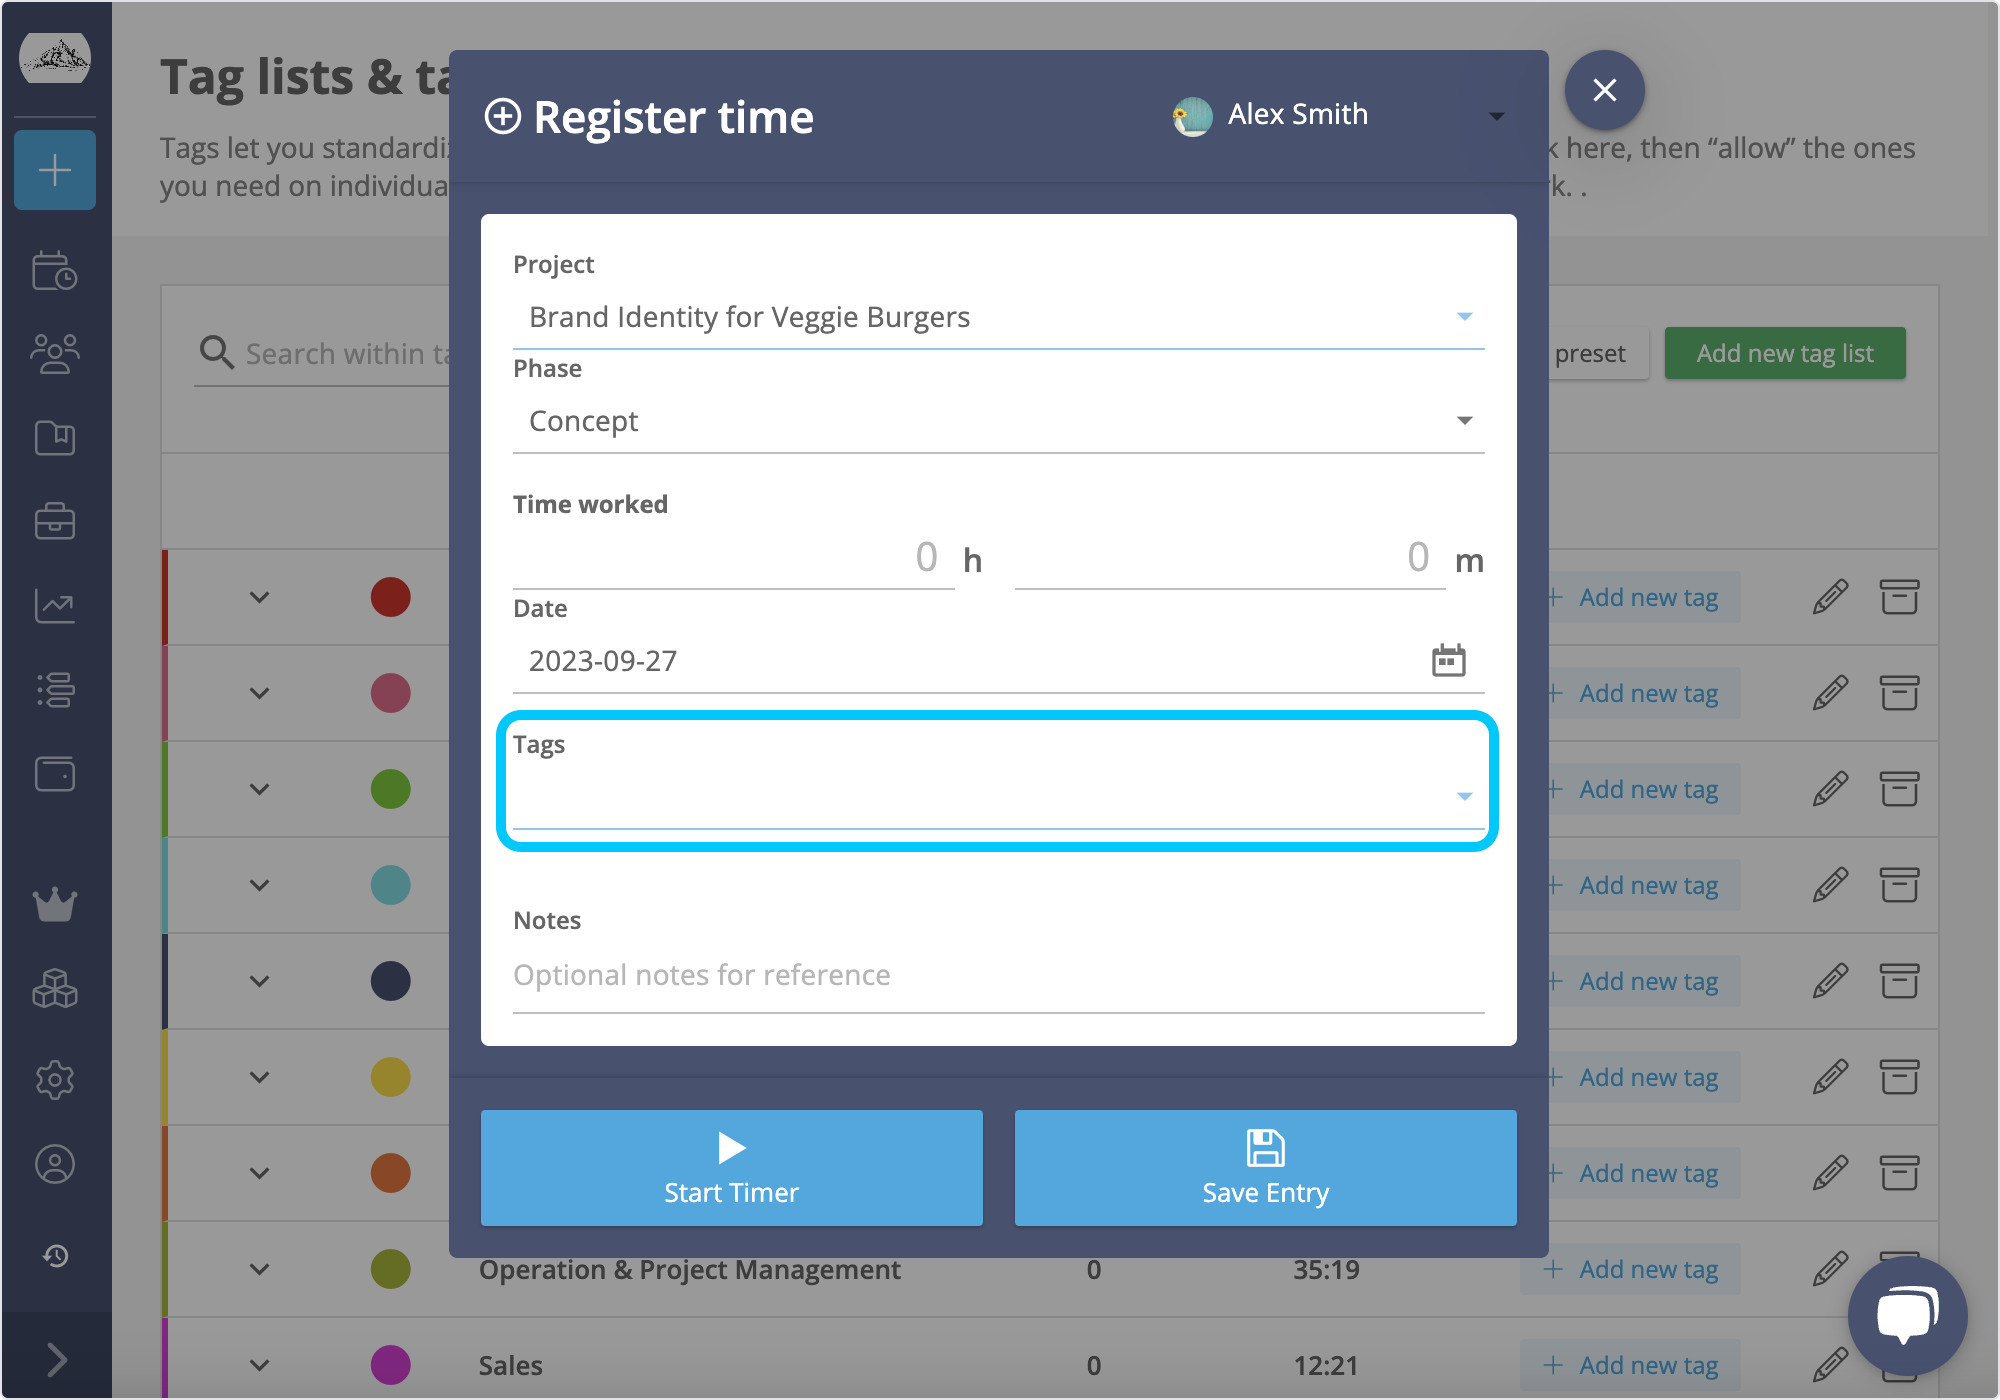
You can assign one or more tags to a time entry:
After creating the entry or starting the timer, the tags associated with it will be visible on the card.
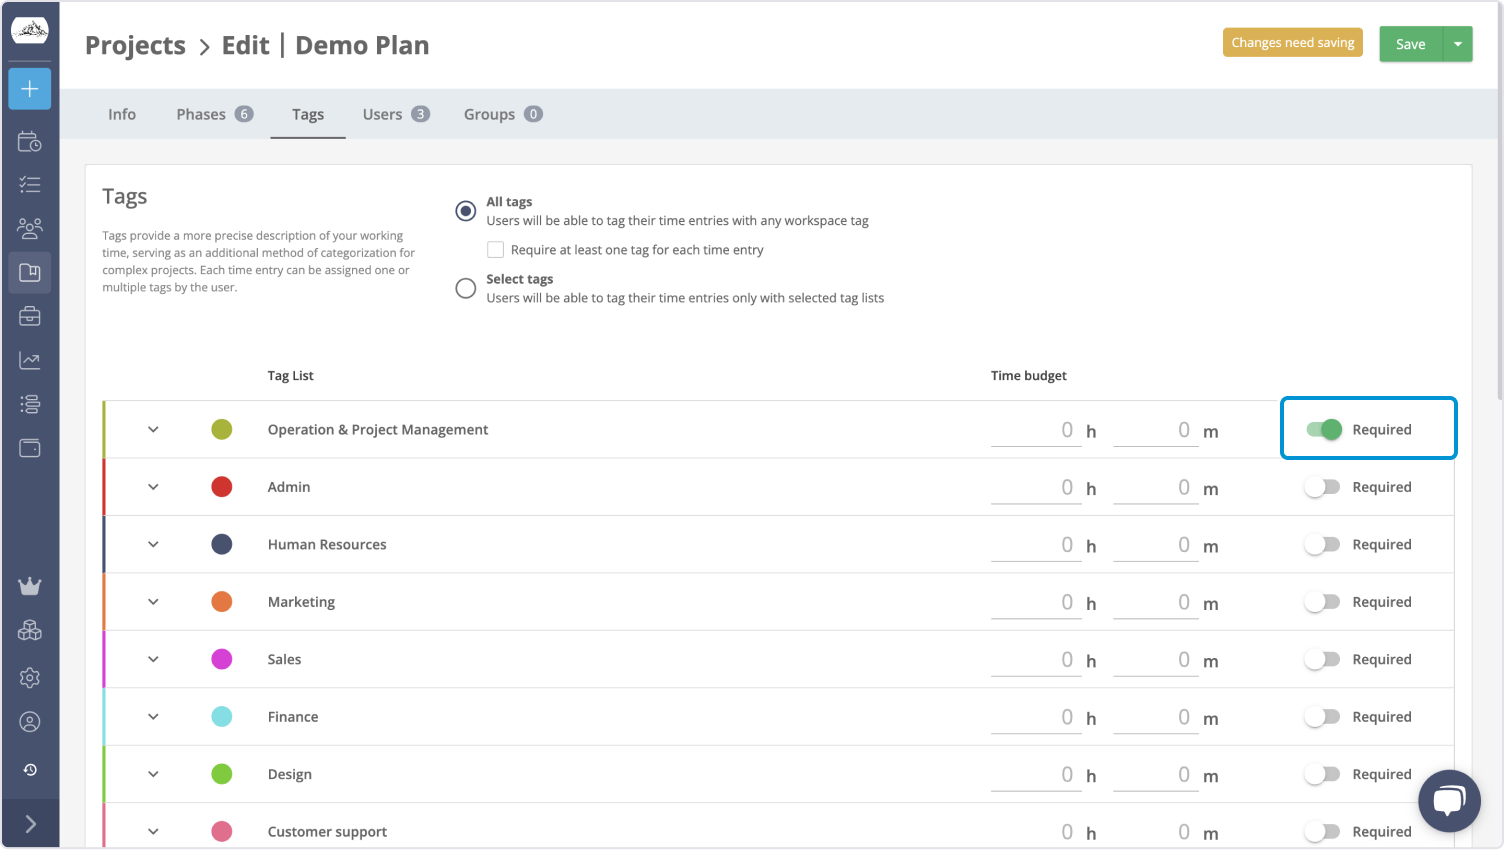
When creating a new project, you can choose between "no tags," "All tags," or "Select tags" options to efficiently manage tag lists at the project level. This ensures that entries are properly categorized without the hassle of individually editing each project. Additionally, you can require at least one tag for each time entry by selecting the "all tags" option when creating a project.
Timeneye offers seamless integrations with various tools and platforms. By integrating Timeneye with project management tools, such as Microsoft Planner you can automatically sync project data and tasks, eliminating the need for manual entry.
Timeneye also integrates with Microsoft Teams. This allows team members to track their time directly from these platforms, reducing the need for switching between different applications.
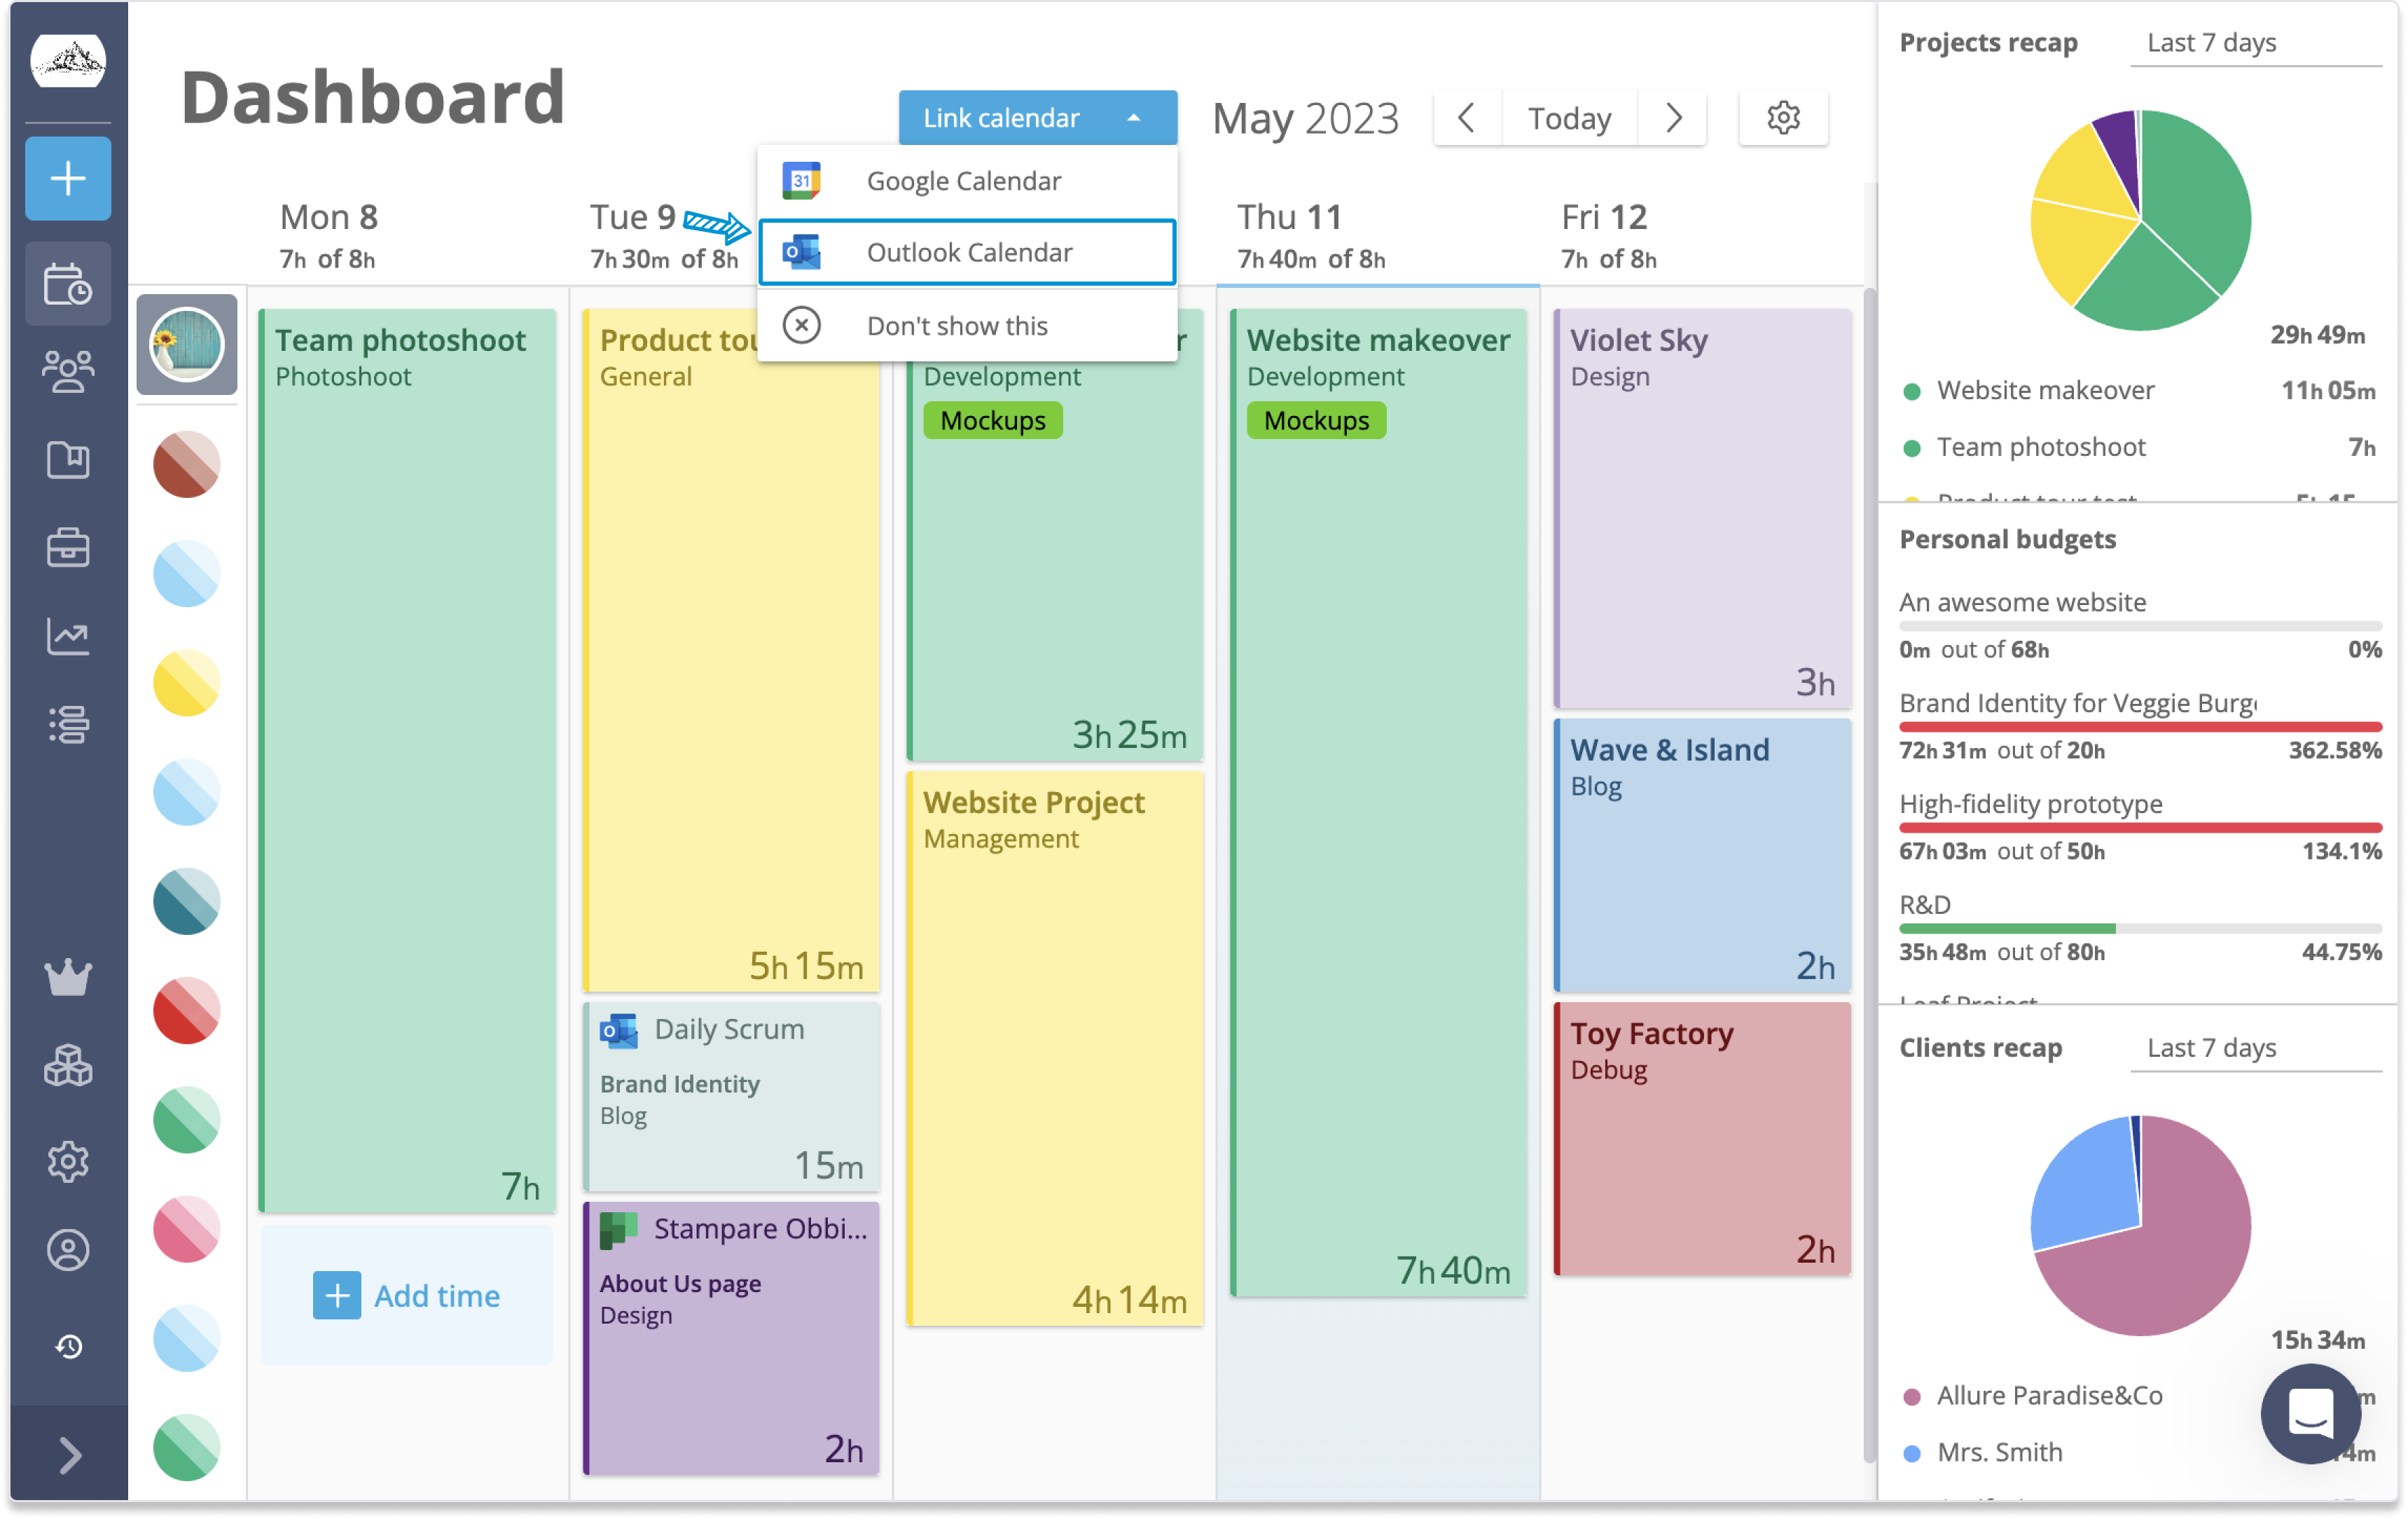
Lastly, Timeneye integrates with calendar applications, such as Outlook calendar, allowing you to easily schedule and track time for meetings, appointments, and other time-related events. This is particularly important for those team members who spend their days in multiple meetings with clients and colleagues.
This integration can be activated from the Integration section of Timeneye:
The Timeneye app for Microsoft Teams can be easily downloaded from the App Store in the Teams desktop app. All users need to do is to download and install it.
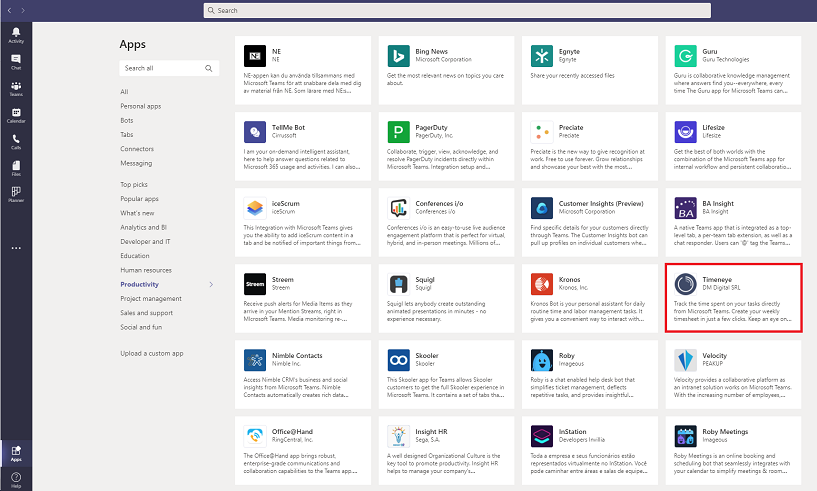
(Here's also a quick link to install the Timeneye app for Microsoft Teams)
This integration must be activated at an individual level, by each team member, and it will automatically sync the user's calendar events. All they have to do is to either click the Link Calendar button at the top of the dashboard or go to the Integrations section.
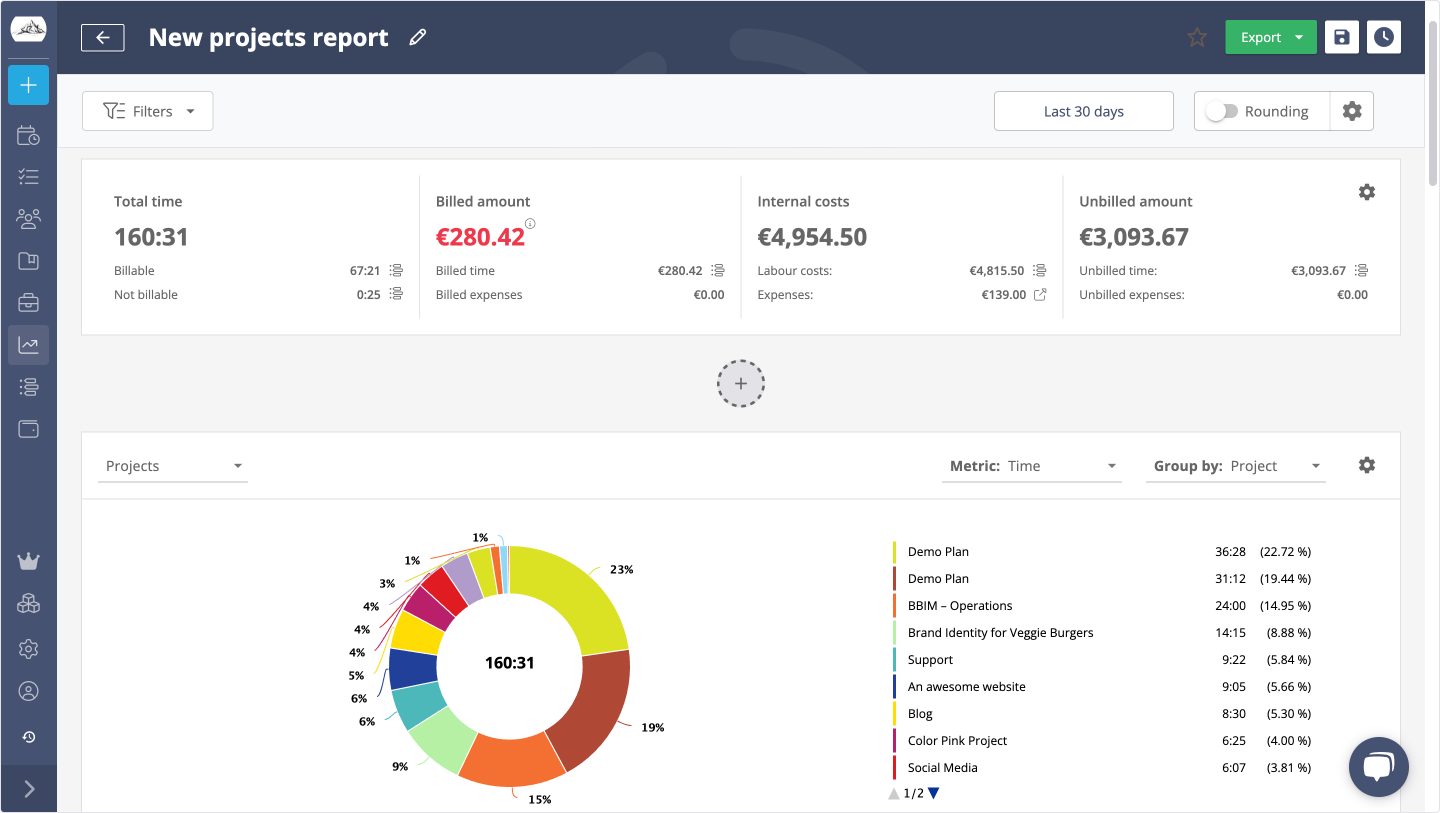
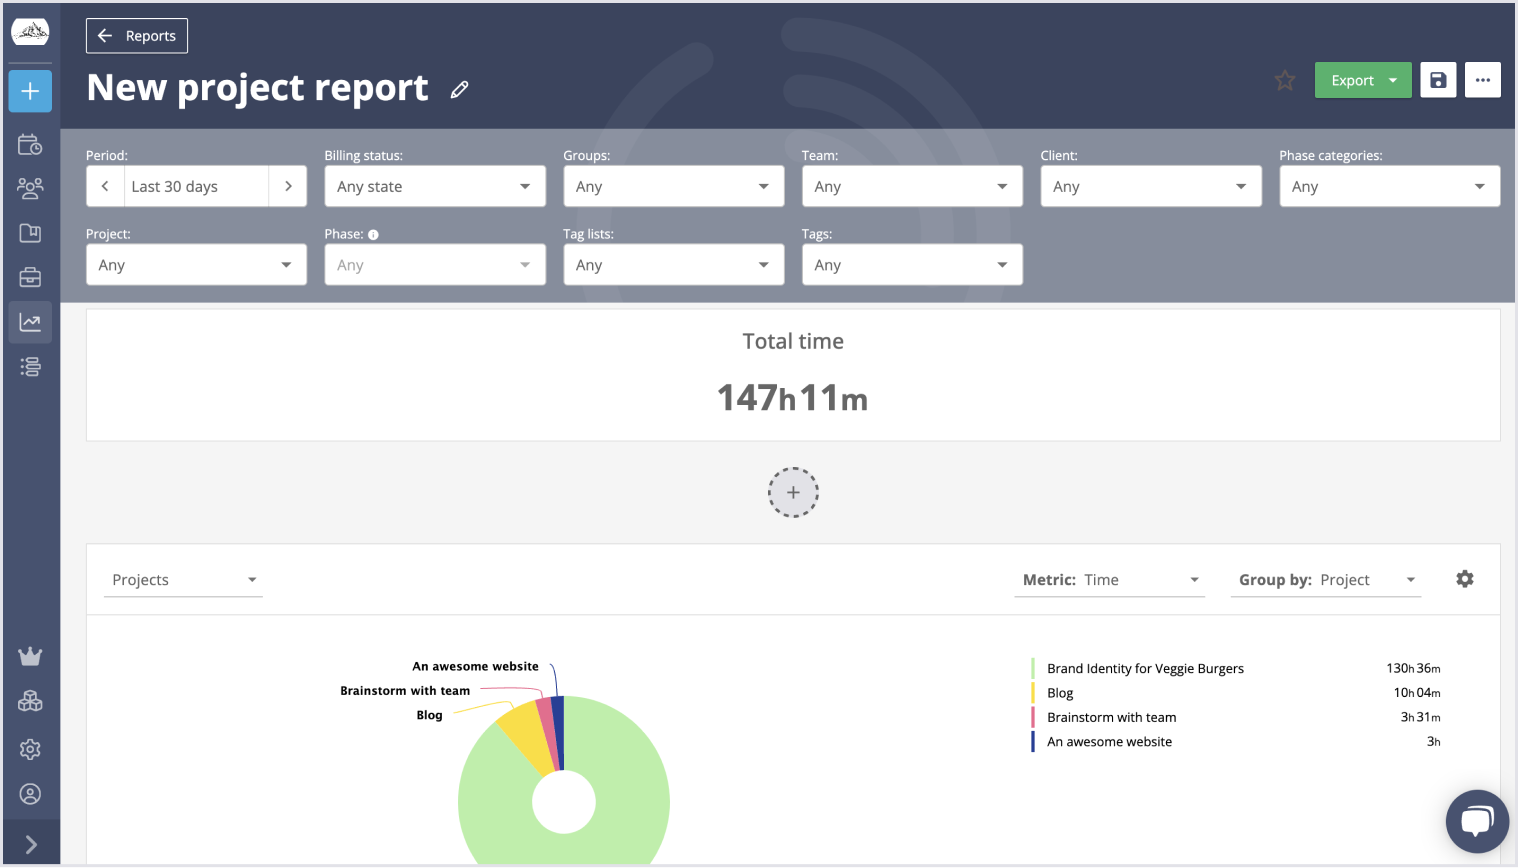
One of the key benefits of using Timeneye for tracking time on large projects is the ability to generate detailed time reports. These reports provide valuable insights into how time is being spent on different projects and tasks.
By regularly analyzing time reports, you can identify any inefficiencies or areas for improvement. For example, you may notice that certain tasks are taking longer than expected or that certain team members are consistently falling behind schedule. This allows you to take necessary actions, such as reallocating resources or providing additional training, to optimize efficiency.
Additionally, time reports can help in identifying patterns or trends across projects. For example, you may notice that certain types of projects require more time or resources than others. This information can be used to adjust strategies and allocate resources more effectively in the future.
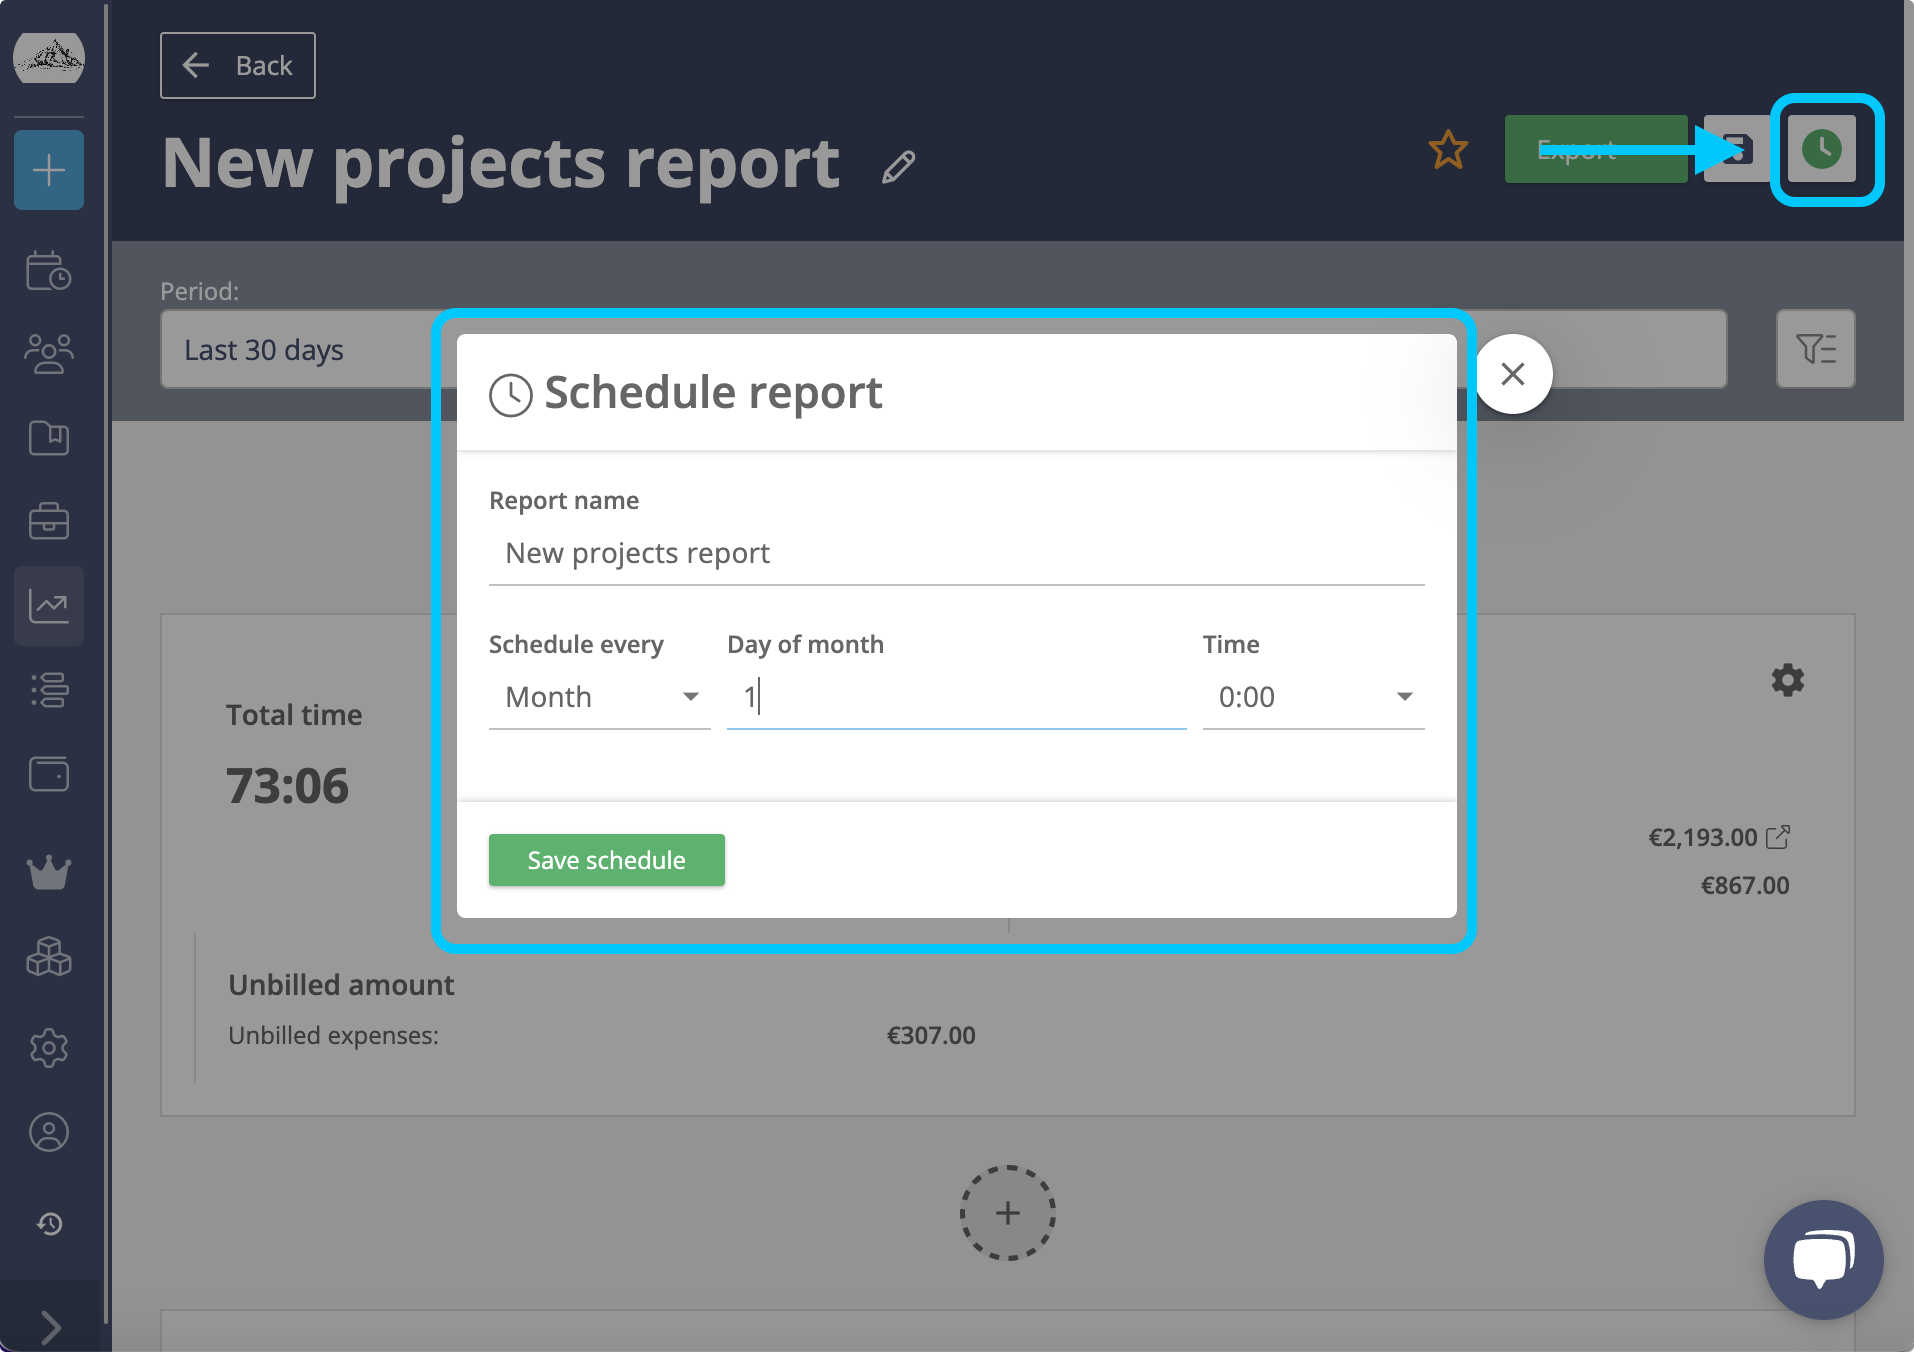
Once you have done that, you will receive the report automatically via email.
Once you have done that, you will receive the report automatically via email.
In conclusion, utilizing Timeneye for large-scale project management offers a comprehensive solution for efficient time tracking and organization.
By following the steps such as importing projects, assigning team members, creating custom tags, and integrating with various platforms, you can streamline your project management process.
Analyzing time reports and adjusting strategies based on insights gained from the data can further optimize efficiency and productivity.
Remember to make use of the provided best practices and tools to make the most out of Timeneye for your project management needs. Start implementing these strategies today and see the positive impact on your project outcomes.
Discover Timeneye, the perfect time tracking tool for enterprises, small teams, and freelancers. Track projects, analyze team performance, and boost...
Learn how to get started with Timeneye, a user-friendly time-tracking tool for teams and freelancers. Track time, create timesheets, and stay...
Simplify project management with Microsoft Planner and Timeneye time tracking. Learn how to set up projects, create tasks, track time, and meet...