How to Timeneye

Timeneye Quick Start Guide - User Edition

Subscribe

Getting started with Timeneye

Timeneye is a time-tracking tool designed with simplicity in mind. Thanks to its straightforward and intuitive interface, Timeneye is the perfect time tracking software for enterprisessmall teams, and freelancers alike!

Timeneye will help you track your time, create your timesheets, visualize your daily effort, and keep the projects you're working on all in one place. 

Ultimately, Timeneye will help you get your timesheets done and focus on your daily work, which you can visualize every day.

Before you begin:

 Join your company's workspace

If your team is already using Timeneye, you do not need to create a new workspace, just ask your team admin to send you an invitation.

Once you have received an invitation by email, click on the link and you will be able to log in with your work credentials.

Make sure to check your Spam folder in case the invitation email ends up there.

Still having trouble with the invitation? Contact us

Where to use Timeneye

Our Apps 

Timeneye Web appapp.timeneye.com 
Timeneye Browser Widget: for Chrome, Firefox, for Microsoft Edge 
Tracking time on the go: Timeneye App for AndroidTimeneye App for iOS 

Microsoft Teams user? Make sure to download and install the Timeneye app for Microsoft Teams


Onboarding: connect calendars and tasks

Once you accept the invitation, you'll redirected to the account setup and onboarding.

During the onboarding, you'll have the possibility to

  1. Link your Outlook Calendar to automatically import your events
  2. Link Microsoft To Do to automatically import your tasks

You can set up both these options later on, but we recommend doing it during the onboarding process.


What you will find in the workspace 

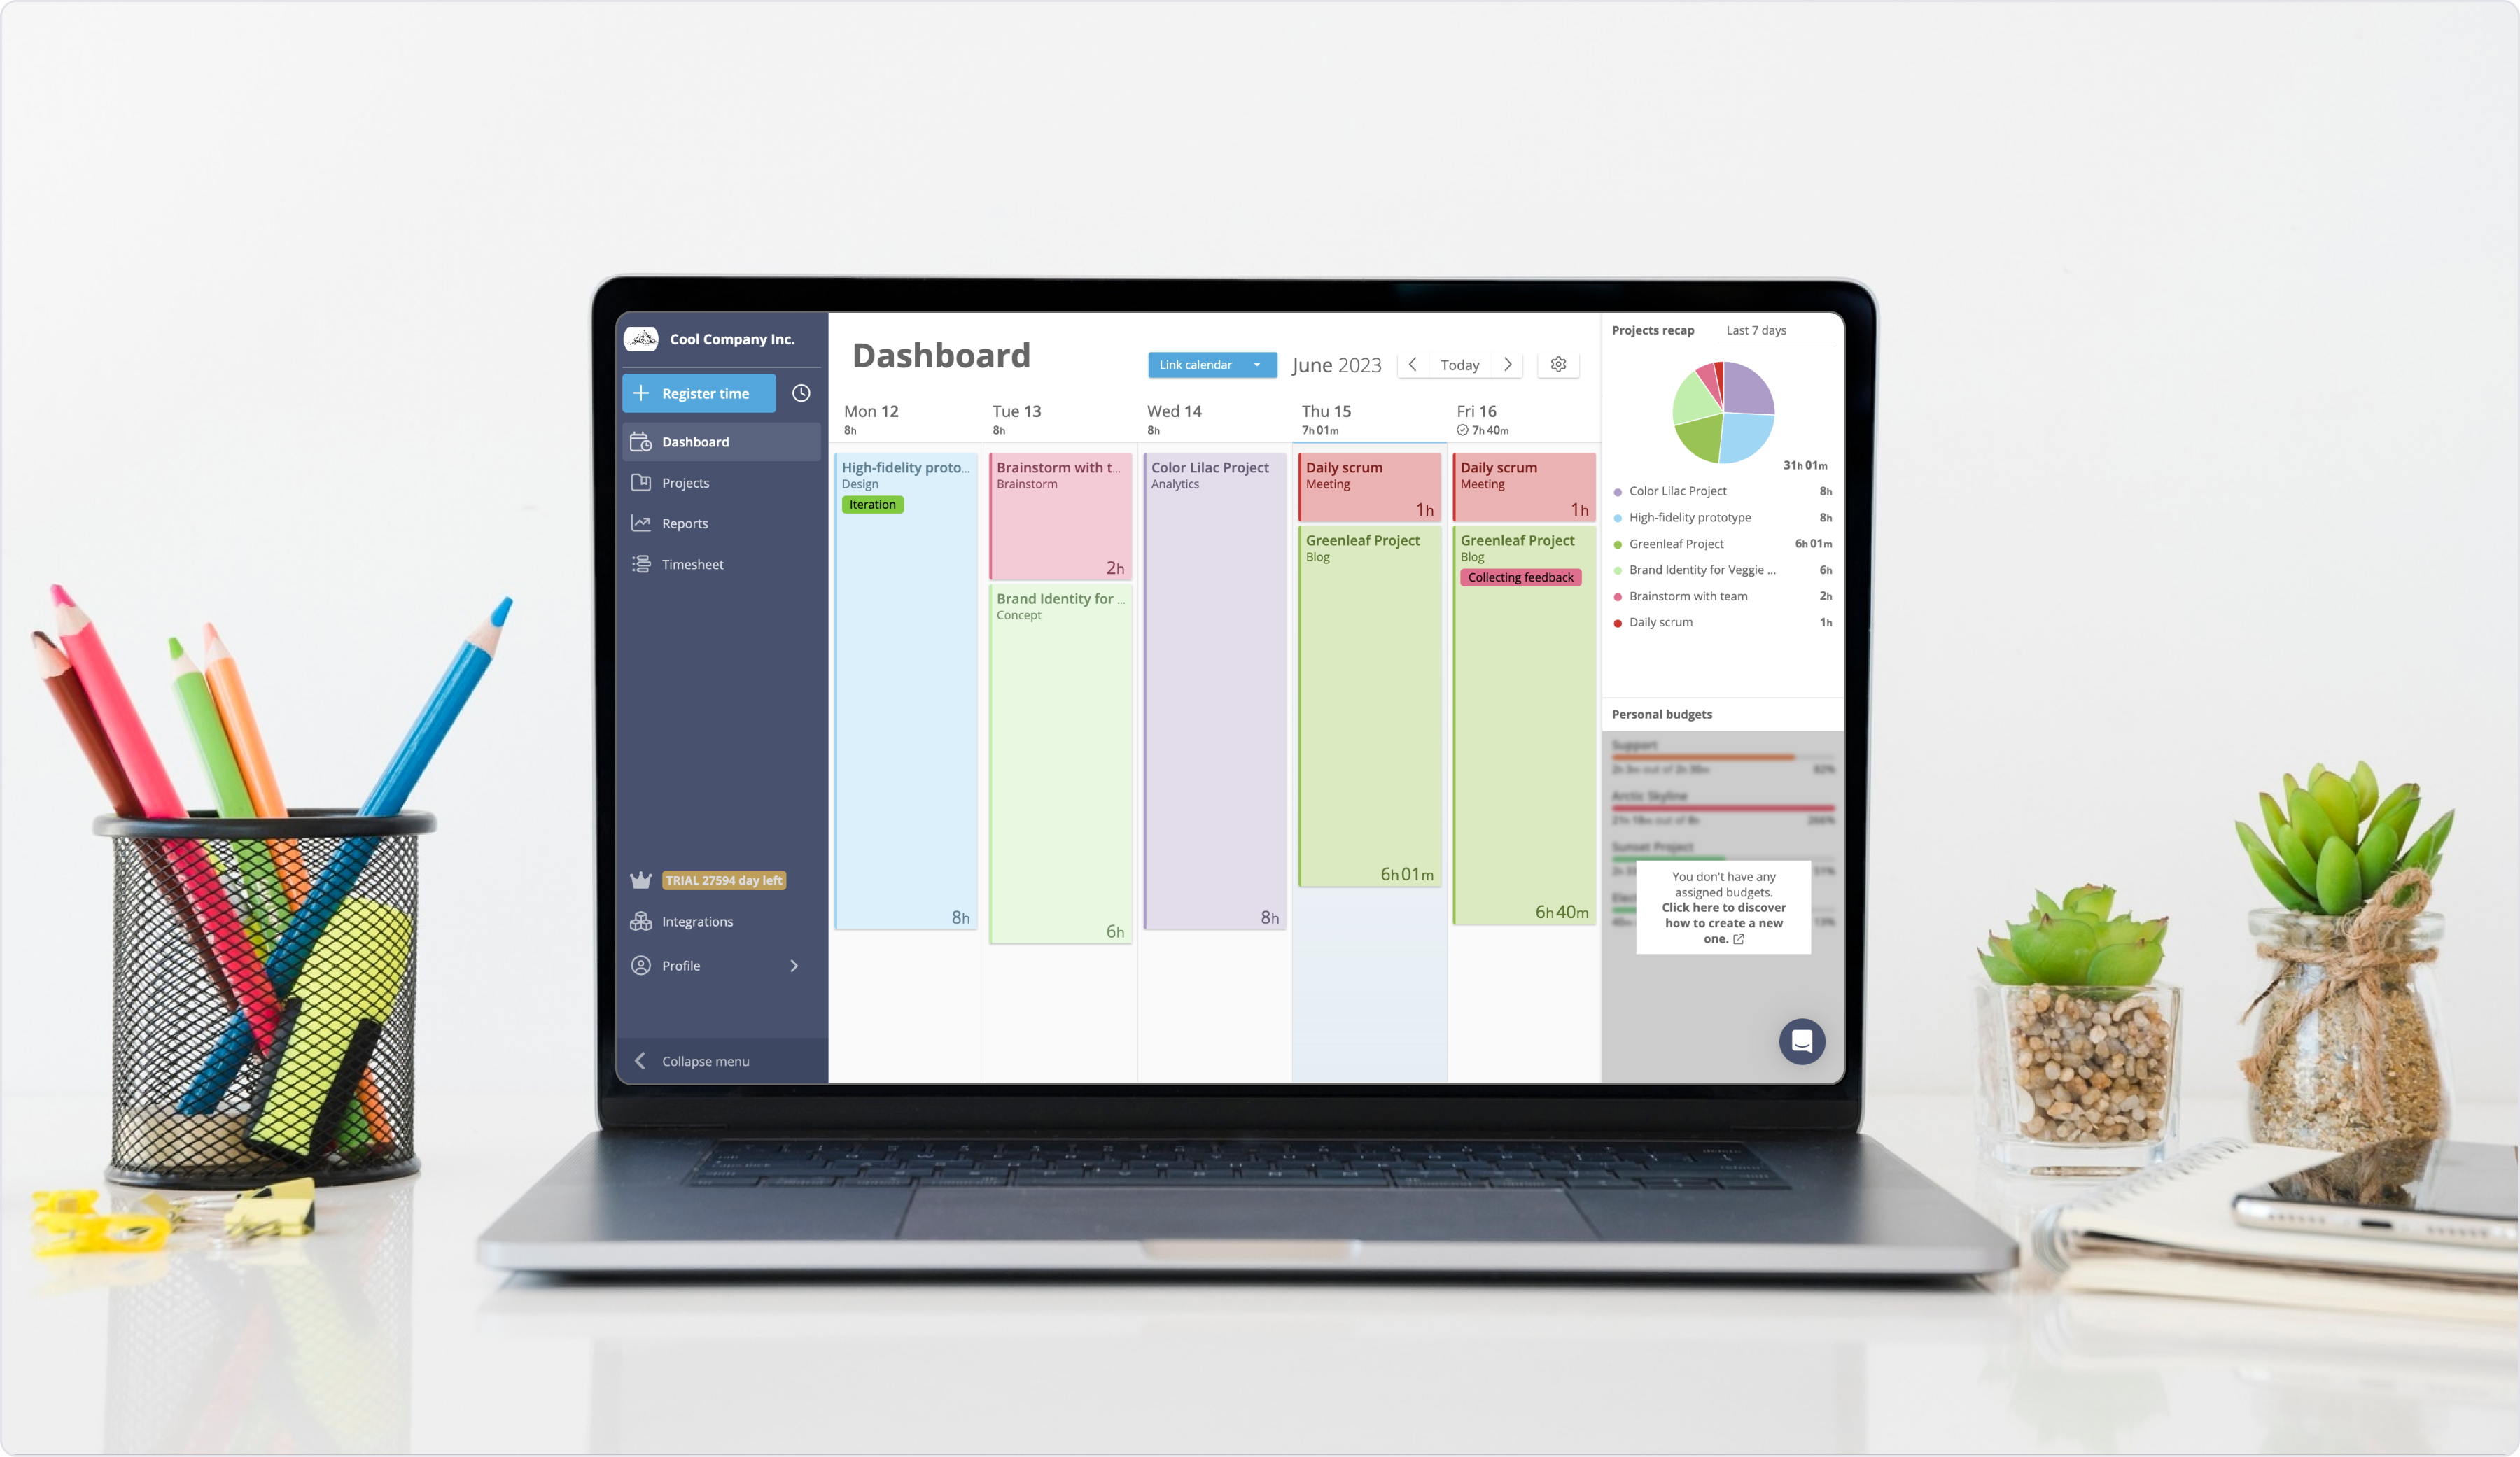
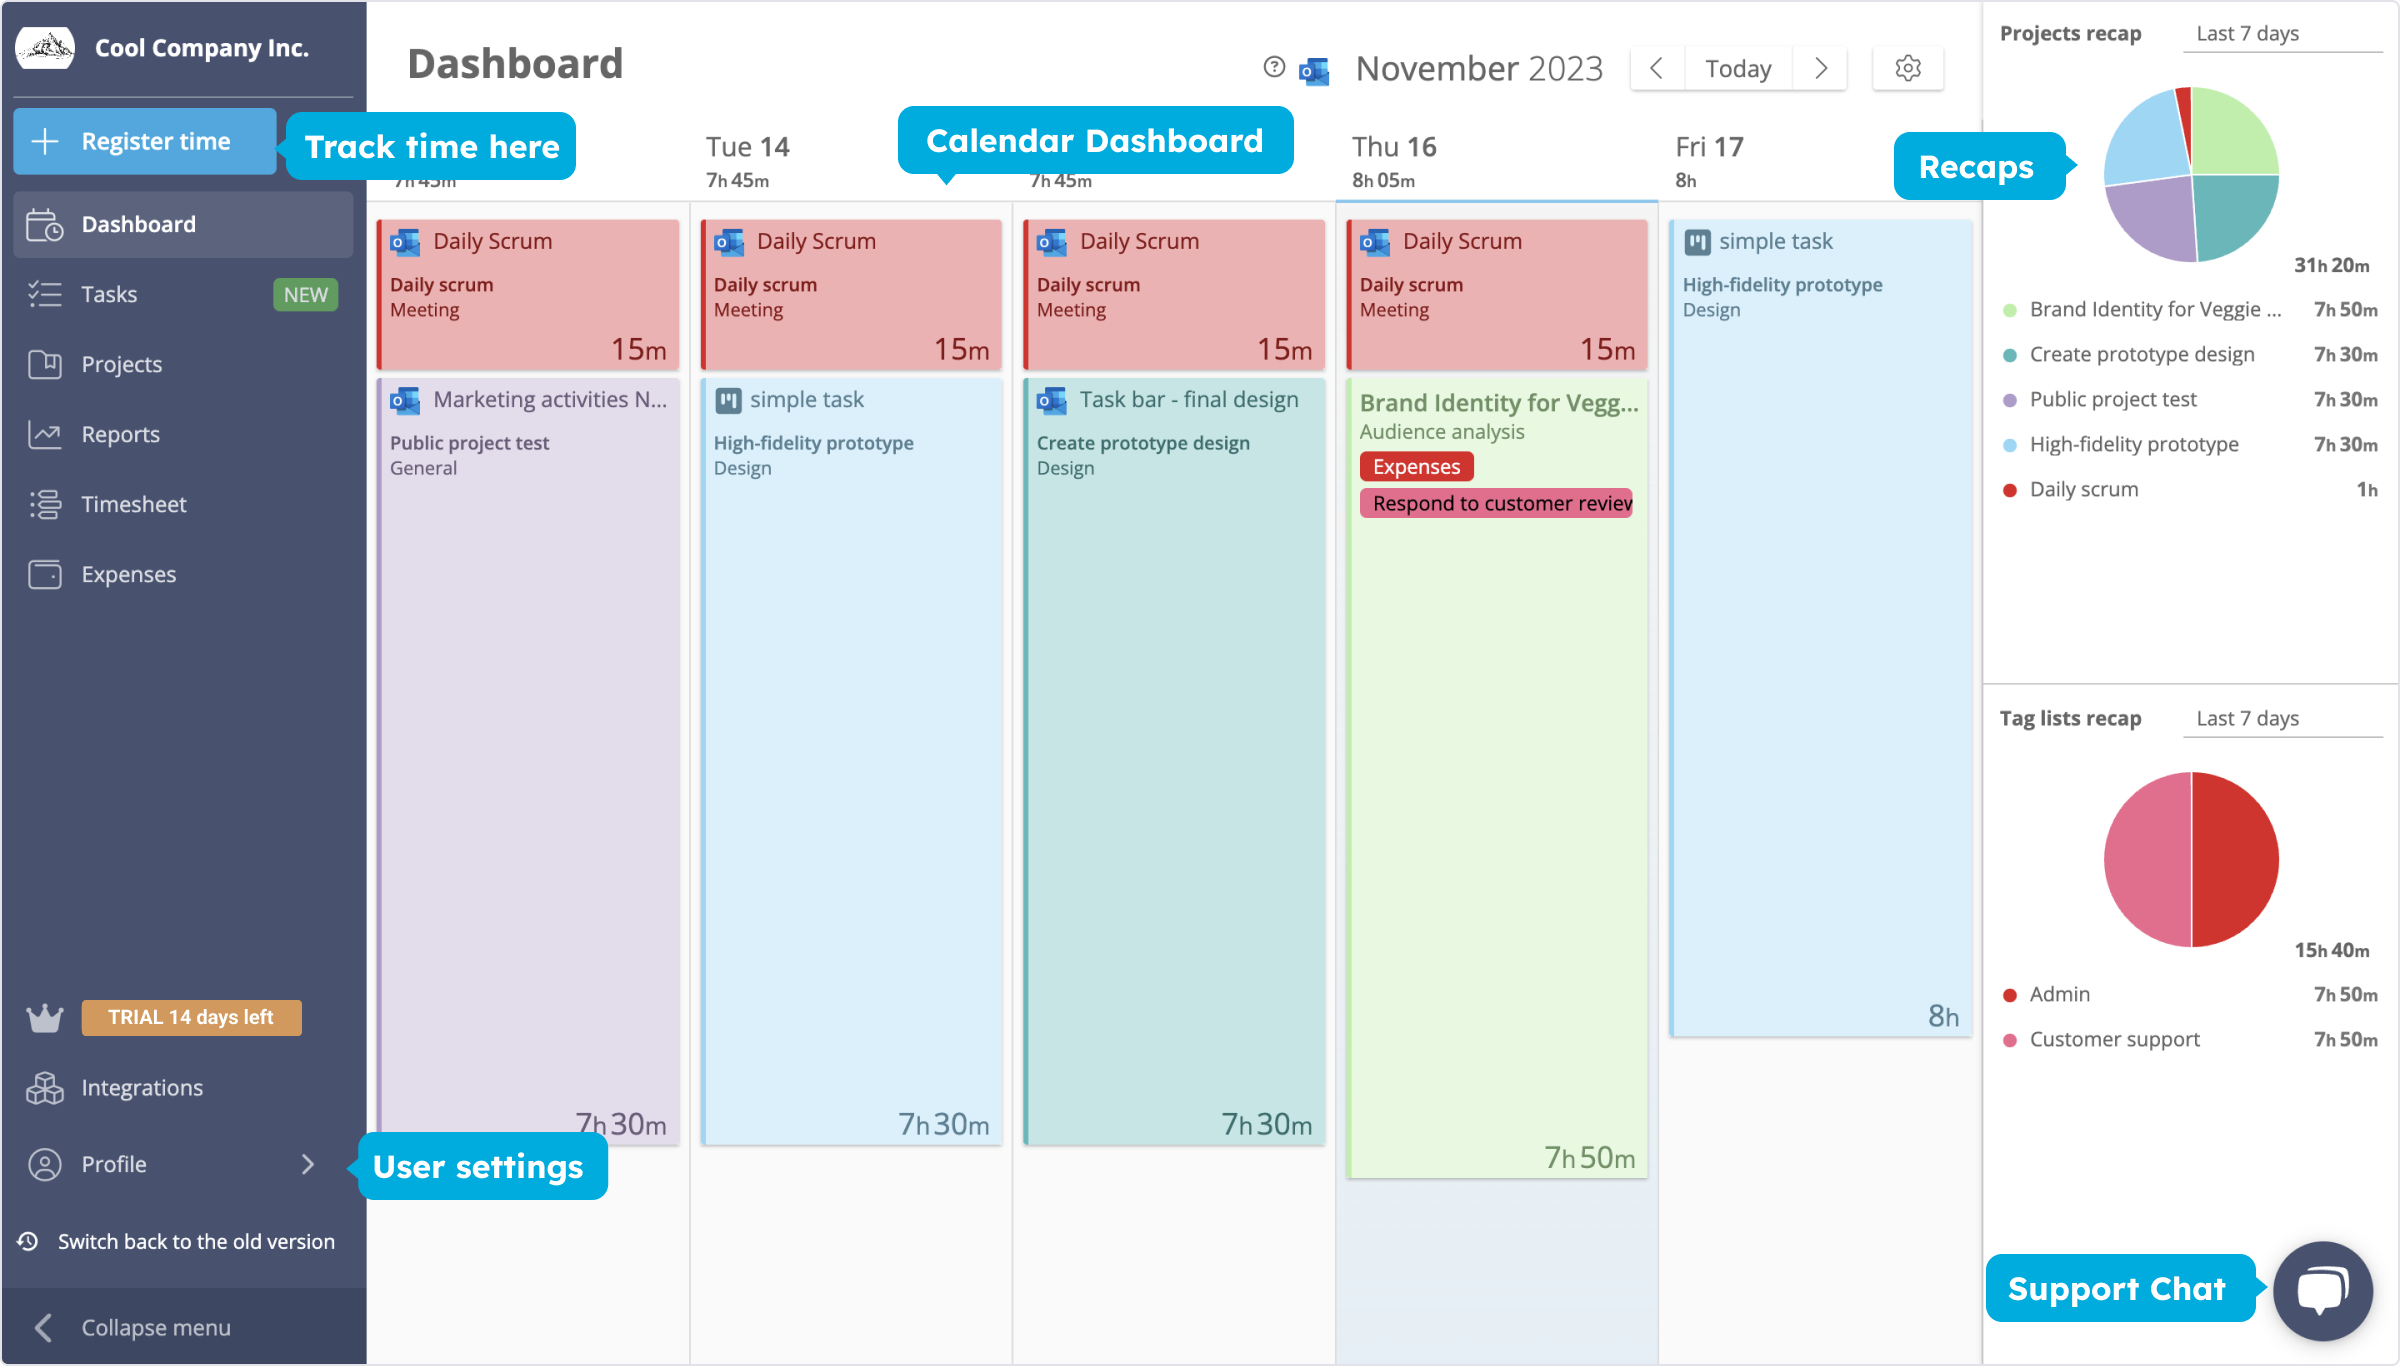
In the Dashboard, you will have a weekly calendar with a visual representation of the time you have tracked day by day. When you start tracking time on a Project, a colorful card will appear in your Dashboard showing the length of your time entry and the project’s Phase linked to it. 

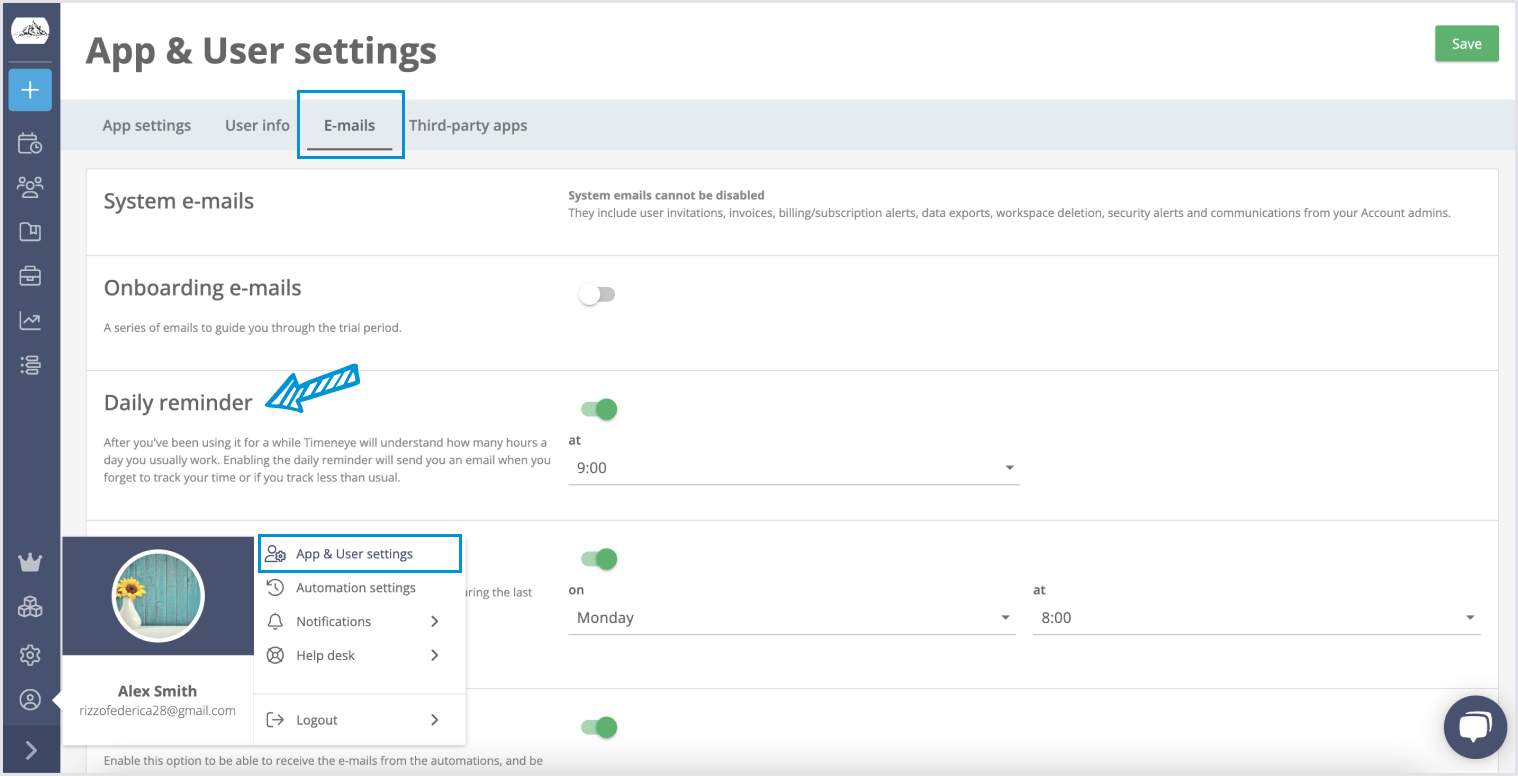
On the left, you can see the main menu in blue, allowing you to move smoothly between the different parts of your workspace. 

In the Tasks section, you'll see all your daily tasks organized by project. You can track time for a specific task there.

You can find the recap modules on the right-hand side: personal projects recapclient recapand personal budget recaps. You can personalize the module's position and type by clicking the gear button.  

Customize your settings in the section User profile section on the bottom left.

New User dashboard

Where to find your daily tasks

Our Tasks section helps you visualize and prioritize your work. In the Tasks section you'll be able to find your daily assignments.

If you have connected Microsoft To Do during the onboarding, you'll find your To Dos imported there. Use the "assigned to me" filters to see your tasks.

From there, you can also track time for specific tasks. Otherwise, in order to track time, read the guides below.


How to track time in Timeneye

When you access Timeneye, the workspace should already be set up with some of your projects, created by the owner of the workspace. Which means: it's time to track your time! 😉

The core of the time tracking functionalities is the blue Register time button at the left side of the menu.

 Enter the time manually (i.e.: “2h30”);

 Start a timer and let it run while you work.


Time tracking: manual mode

To register a time entry, click on the blue + button on the left side of the menu. Then:

1. Select a Project;
Projects are compulsory to track time in Timeneye. You can pick a project from the list under the Projects menu;
2. Select a Phase;
Phases, too, are compulsory to track time, so make sure to have at least one phase for every project.;
3. Enter the time duration (h; mm);
4. Select the date (dd, mm, yyyy); 
5. Click on Save entry.

timeneye time entry
Troubleshooting

 "I need to track time, but I can't find the project!"

Due to Timeneye's levels of permission, not all users in the same workspace have access to the same features. So, you may not be able to create the projects you need to track time for.

If you don't find your projects in the dropdown menu, reach out to the Owner of your workspace and ask them to either 1) Create the project or 2) Add you to the project so you can track time.

(The Owner of the workspace is the person who sent you the invitation)


Time tracking: timers (real-time)

Timers allow you to track time while you work. If you need a timer to keep you focused on the task at hand and a more precise way of measuring time, you should use timers.

Open the Register Time dialog:

1. Select a Project;
2. Select a Phase;
3. Click on the Start timer.

timeneye timer


An active Timer will automatically appear in your calendar.
You can recognize an active timer by the small green dot blinking in the bottom right corner. Timers are also bigger than entries and paused timers.

active timer
 
Suggestion:


 Auto-save your timers

Do you keep lots of open timers and forget to stop them?

In the User settings section of the workspace, you can set up the daily auto-save for your timers. You can set it at your office closing time, or at different times of the day.

Read more about our Time tracking features

Link your work Calendar to Timeneye

We have built native integrations with Outlook Calendar and Google Calendar. Thanks to these integrations, you can bring all your calendar events to Timeneye, and include them in your timesheets.


Link the calendars using the Link Calendars option on the dashboard.

link calendar


Once your calendar is linked, all your events will be imported to Timeneye as Suggestions. Below you see what a suggestion looks like. 

Click on the suggestion to track time, and you will finally know how much time you spend on meetings, conference calls, and so on!

suggestions

How to set time tracking reminders

In our busy days, it's easy to forget to track time. Make time tracking a daily habit, with the Daily reminder email:

  1. From the Main menu on the left, click the Profile icon on the bottom right;
  2. Go into App&User settings;
  3. In the Emails tabs, find the Daily reminder option, select the time of the day you want to receive the email, and click the switch to turn it on.
email

How to add time in the past

Do you need to register time for a task you did a few days ago? No worries!

Using the arrows on the calendar dashboard, go to the desired day of the week. Then, hover your mouse on the day, click Add time, and register your entry to the desired date and project.
 
Alternatively, click the Register time button and, click the Date field of the dialog, and using the date picker select the desired day.
 

How to receive any help in case you're stuck

Fear not! We understand it takes time to get used to new software, if you have any questions contact us at support@timeneye.com!

You can also check out our Support guides, for detailed step-by-step tutorials on any of our features.

Productivity awaits!

Now, go to your Timeneye Workspace to track your time 😉

Similar posts

Join our newsletter and get the best tips on productivity, time management and more!